
Battle of Gettysburg Buff
A website for Civil War
buffs interested in the
Battle of Gettysburg
Off the Usual Path
There are so many interesting places that are overlooked by visitors to the battlefield:
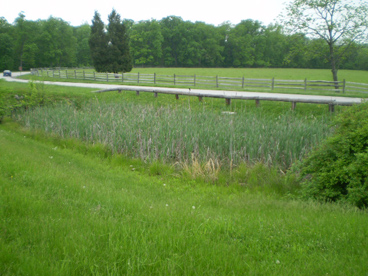
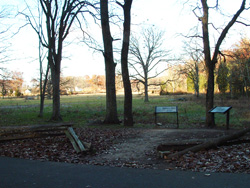
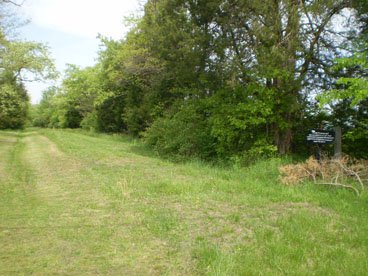
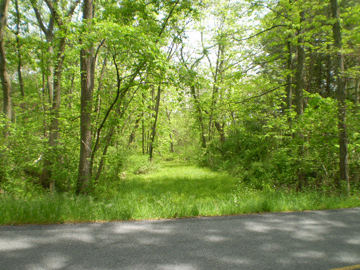
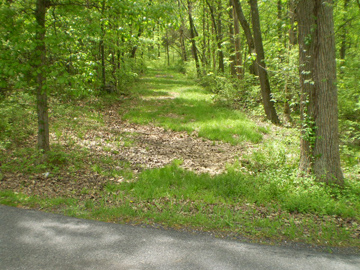
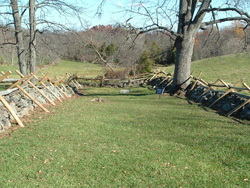
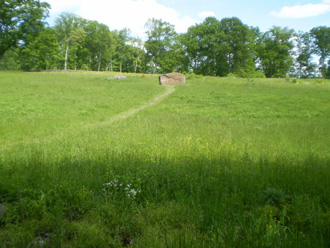
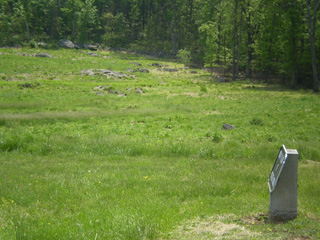
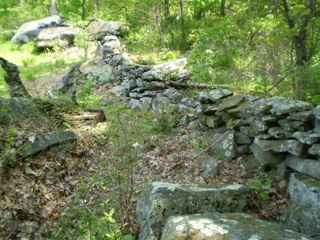
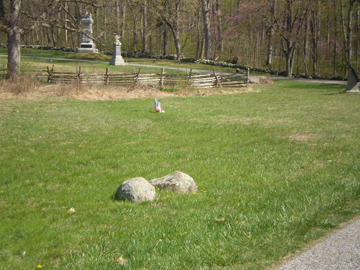
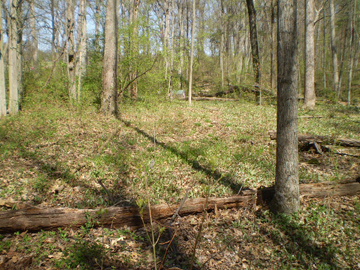
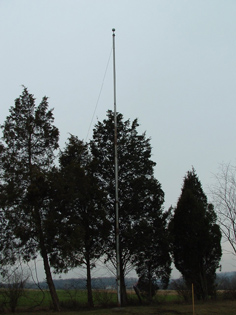
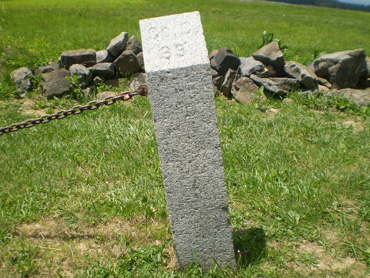
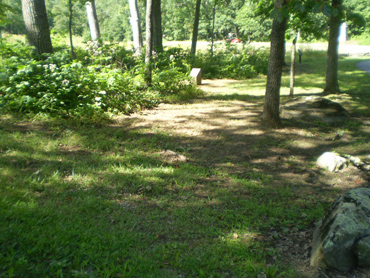
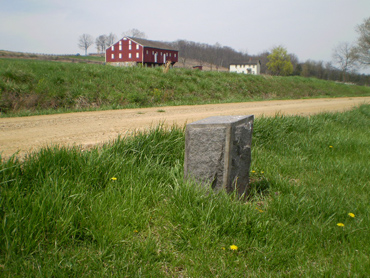
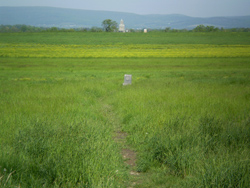
The old trolley lineBelieve it or not, but there once was a trolley line, the Gettysburg Electric Railway, to and from the lower portion of the battlefield between 1893 and 1917. According to Charles Teague, the compiler of the pocket booklet called "Gettysburg: By the Numbers" (an excellent reference book of important statistics as well as other interesting information and trivia), there were six trolley cars: Hancock, Howard, Reynolds, Sedgwick, Sickles, and Slocum (there was no car named for General George Sykes, commander of the Union V Corps). Today, as a result of the ongoing efforts of the National Park Service to restore the landscape of the battlefield as much as possible to what it looked like in 1863, the path of the trolley line is easily located and accessible for hiking and exploring. The photo on the left was taken at the bottom of the famous "Triangular Field" (the photo on the right) south of Devil's Den and looking west (right) toward the Wheatfield. Much of the 12-mile trolley line path (which ran from downtown Gettysburg along Emmitsburg Road, across the lower side of the Wheatfield to Devil's Den and in front of Little Round top, then going back to town along Cemetery Ridge) is easy to recognize, and along with making it a great hiking and nature trail, it also provides many unique vantage points of so many areas of the battlefield.
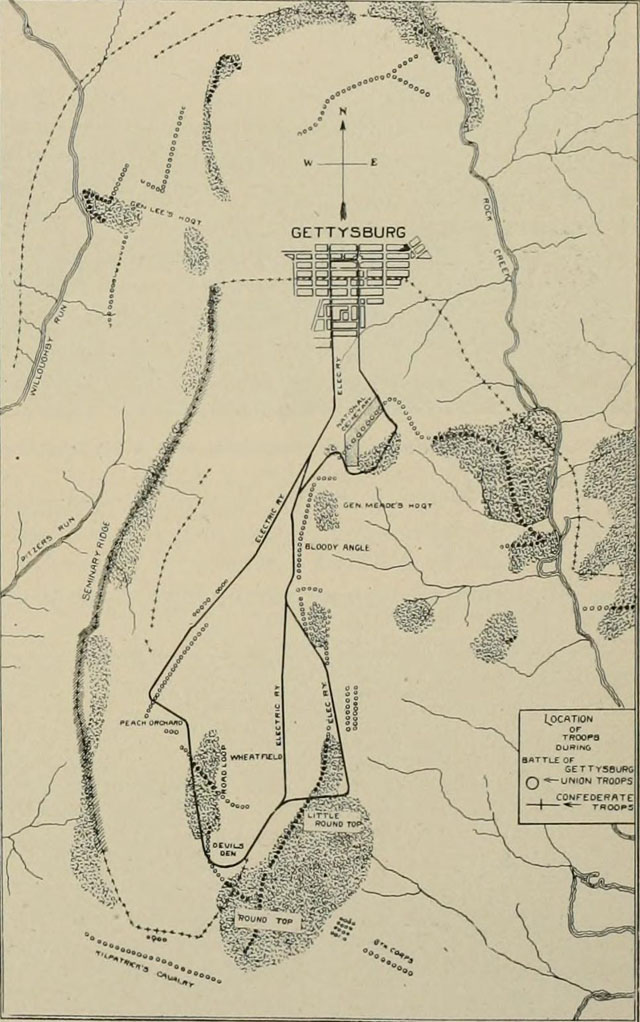
(Map courtesy of the GNMP)
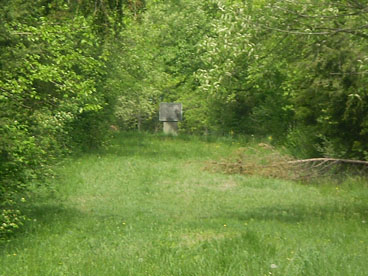
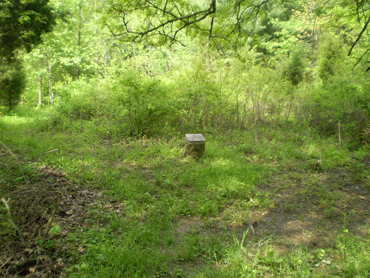
A small but interesting feature that is easily overlooked, because at first glance it looks like a small drainage culvert, is what I am told Licensed Battlefield Guides refer to as the Codori Spring. Located on Cemetery Ridge northwest of the Pennsylvania Memorial and about 15 yards west of the intersection of Hancock Avenue and Pleasonton Avenue, this small spring was created for the trolley line visitors to use:
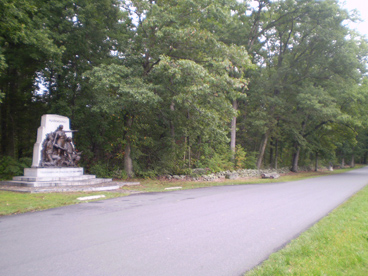
The old railroad lineIn addition to an old trolley line, there was once a spur of the Gettysburg and Harrisburg Railroad that was used to transport visitors from downtown Gettysburg to and from the southern portion of the battlefield to Round Top Park. Completed in 1884, the railway line came down from the north along Oak Ridge to the depot on the western side of town at Washington Street and Railroad Street, with the spur running southward directly across the fields of Pickett’s Charge and ending at the eastern side of Little Round Top (see the map below):
(Photo of Hancock Avenue looking south courtesy of Licensed Battlefield Guide Phil Lechak)
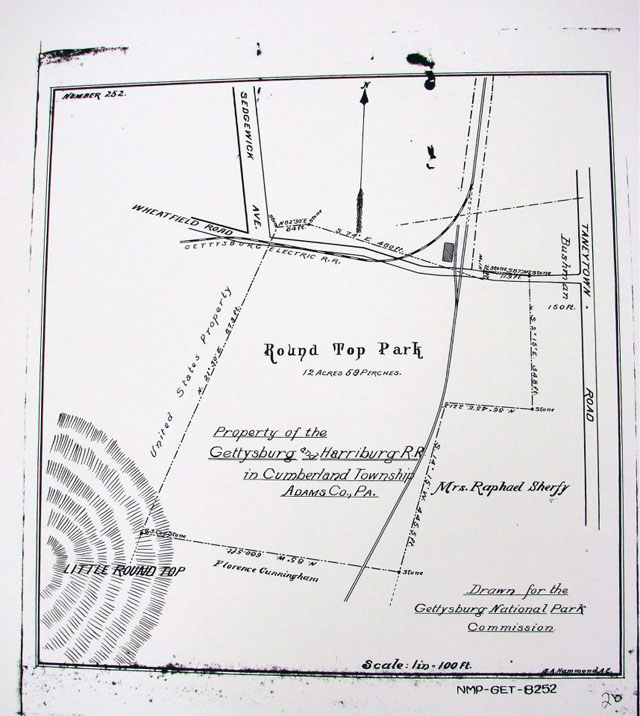
(Map courtesy of Mike Waricher and the GNMP)It should be noted that Round Top Park (as shown on the map above) was approximately 12 acres in size and owned by that railroad. Round Top Park included a cook house and dining hall, a picnic pavilion, a dance pavilion, a shooting gallery, a merry-go-round, and a casino.
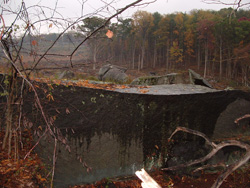
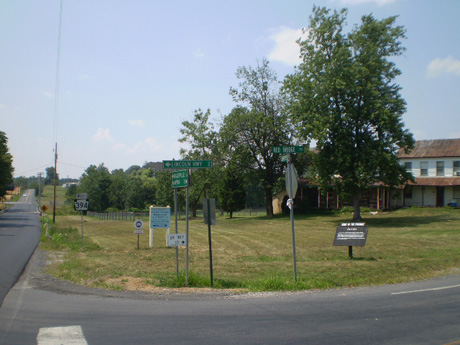
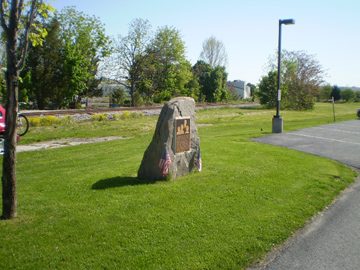
Although the railroad property was sold to the Gettysburg National Military Park Commission in 1896, all of the railroad tracks of the spur were not removed until 1939. However, some of the railroad ties could still be found on the property of Codori Memorials, located on the western part of town at 400 West Middle Street:
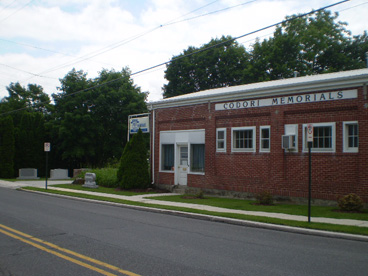
However, in 2017, Healthy Adams Bicycle/Pedestrian, Inc. (HABPI) had begun the construction of a bicycle/walking path in that area and by late October were in the process of removing the remaining railroad ties. Fortunately, they allowed us to quickly organize a small group of volunteers who on November 11 were able to salvage three of the best ties and transport them to the Gettysburg Heritage Center located at 297 Steinwehr Avenue for inclusion in a future display regarding the Gettysburg and Harrisburg Railroad. We would like to extend a hearty THANK YOU to the following individuals for their successful efforts to save a small piece of Adams County history: Randy Drais, Alan Leeti, Alan and Louise Mains, Keith and Sheila McGill, and Tom Miller:
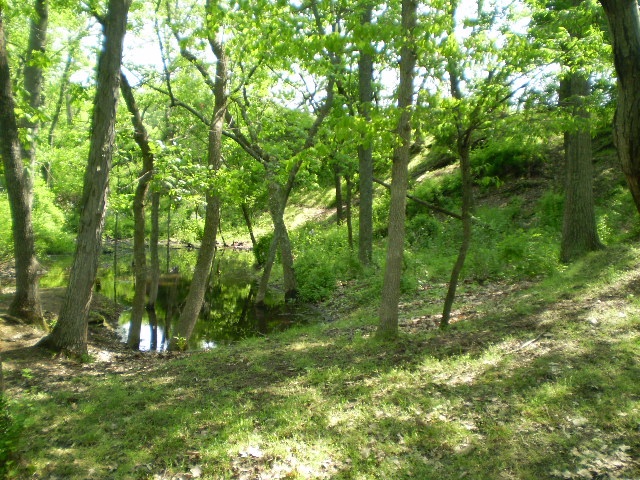
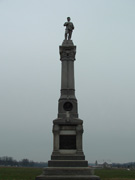
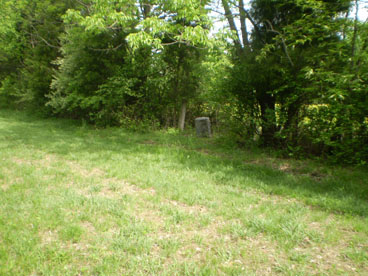
In addition to Round Top Park and Tipton Park (see the “Small non-military markers” section on my “Odds and Ends” page), there was also another park on the battlefield at one time. Wible Park, more commonly known as "Wheatfield Park" in newspaper articles, was basically a picnic area in Rose’s Woods that was one of the stops on the Gettysburg Electric Railway trolley line. The grove/trolley stop included a small shaded platform and a souvenir stand similar to the other souvenir stands in Tipton Park and Round Top Park. William Wible (who was born in 1825 in Adams County), who had purchased the George Rose farm, was an enterprising farmer who, during the 1880’s and early 1890’s, also operated as a battlefield guide and took in paying guests during the summer months who could walk through the woods to the Wheatfield, Devil's Den, and Little Round Top as part of their "bed-and-breakfast" experience. Stocking a pond with shad, Wible also harvested the fish for sale in town (the remains of the shad pond dam that was between the house and "The Loop" are still visible).
(Image courtesy of the GNMP)Wible also sold roughly 30 acres of his 225+ acre farm to the Gettysburg Battlefield Memorial Association to assist in their efforts to preserve the battlefield as well as creating a small quarry on his land to provide flank markers, monument bases, and the like (see the “The other “Quarry” -- Wible’s “Quarry” section further below on this page). It is my understanding that Wible Park may have been roughly 25 acres in size and marked on a map in the Gettysburg National Military Park archives – I will post a copy of the map if and when I am able to find it in the archives.
There was also another type of park on the battlefield at one time --- a baseball park. From an article in the July 24, 1894 edition of the “The Star and Sentinel” Gettysburg newspaper:
Base Ball Park
The base ball team has secured from F. G. Pfeffer, a lease of the latter’s lot, situated south of his house on the Emmitsburg road, which they intend to fit up as a base ball park. The ground has natural advantages for a diamond and with a little work will make an excellent field. Its situation along the line of the trolley road will make access to it most easy and convenient. It is expected to have it in condition for the next game scheduled here. We wish the boys success in this effort.
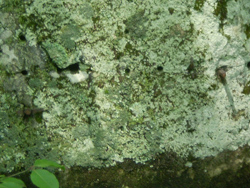
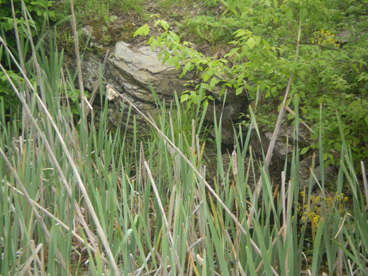
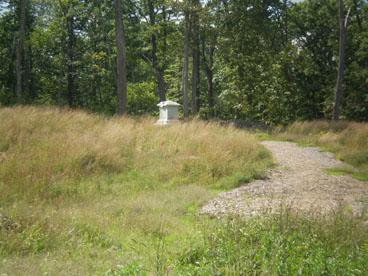
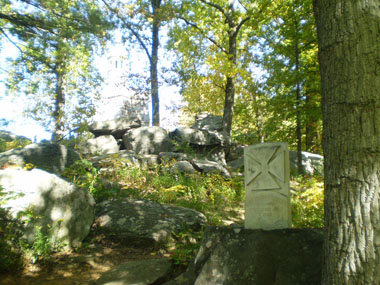
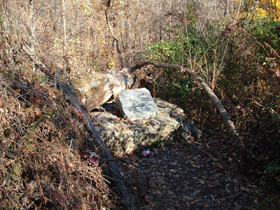
The "Quarry"Again, as a result of the ongoing efforts of the National Park Service to restore the landscape of the battlefield as much as possible to what it looked like in 1863, the "quarry" is now more easily located from the old trolley line path and about 150 yards south of the monument to Captain James E. Smith's 4th New York Battery. Many of the rocks, both large and small, have chisel marks (as evidenced in the upper right photo), and it is my understanding that this "quarry" was the source of many of the flank markers found throughout the battlefield. In any event, this area is one of my favorite places to visit, regardless of the time of year.
To learn about the trolley line, quarry, and the three amusement parks that once existed on the battlefield, I highly recommend the book "Devil's Den: A History and Guide" (see my "Books Worth Reading" page).
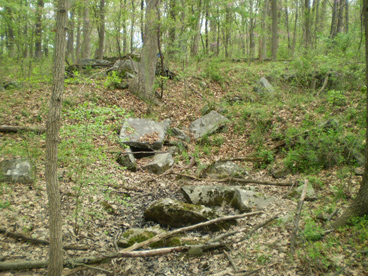
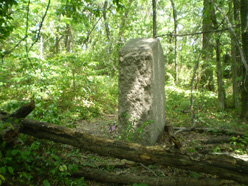
The other “Quarry” -- Wible’s “Quarry”There is another post-battle quarry roughly 550 yards northeast of the one mentioned above that was also used for flank markers, monument bases, and the like. Located in Rose’s Woods just south of the 90-degree bend in Brooke Avenue (look for a narrow footpath visible in the top left photo below and go about 20 yards) south of the Wheatfield, this quarry was at one time owned by William Wible and not only still contains stones with chisel marks and scoring holes, but also many have spikes (often called “feathers”) still remaining in them:
For more information and videos, see the excellent January 21, 2009 story by Licensed Battlefield Guide Rich Kohr at http://www.gettysburgdaily.com/?p=1836.
There are many other smaller “quarries” located throughout the battlefield where rocks and boulders were used to create monument bases, flank markers, and the like. I have read about and found traces of them in the swale on Culp’s Hill, on Powers’ Hill, and in other areas including Wolf Hill near the “Lost Avenue” (see The far right flank of the Union Army - the "lost avenue" section on this page):
I am currently investigating and researching a very small area on the east side of Cemetery Ridge as well. So, in your treks across the battlefield, keep your eyes peeled for stones and boulders with chisel marks --- you may have just stumbled upon a “mini-quarry”!!!
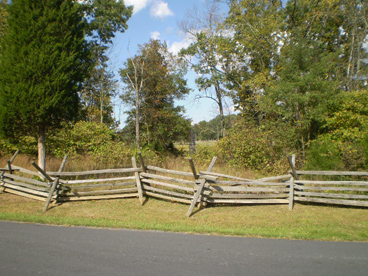
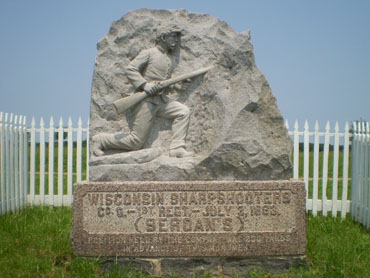
Brockenbrough's QuarryLocated west of McPherson's Ridge, there was a working quarry during the time of the battle and forced Confederate Colonel John M. Brockenbrough's Brigade of Major General Henry Heth's Division of General A. P. Hill's III Corps to shift its attack to the right on July 1. The quarry is much smaller now than what is was during the battle, but it still gives you an idea as to some of the difficult terrain that was often encountered by troops on both sides at Gettysburg but which is hard to truly appreciate when simply reading a book.
To get to the quarry, park near the John Burns statue along Stone Avenue on McPherson's Ridge and walk west a short distance until you reach the monument to the 7th Wisconsin Infantry Regiment. Take the footpath behind the monument and go approximately 200 yards, roughly paralleling the wooden fence on your right. The quarry is at the bottom of the ridge on the right and just before you reach Willoughby Run.
The PondThere were several areas that were once quarried on McPherson’s Ridge, and one of these was the current “pond” located on the east side of Stone Avenue about 100 yards south of the Chambersburg Pike (Route 30). You can still see large stones along the edge of the pond (see the bottom photo):
The pond was included in a photograph by Civil War photographer Matthew Brady shortly after the battle with the caption “McPherson's Woods --- Wheat Field in Which General Reynolds was Shot” as seen below:
(Photo courtesy of the National Archives)
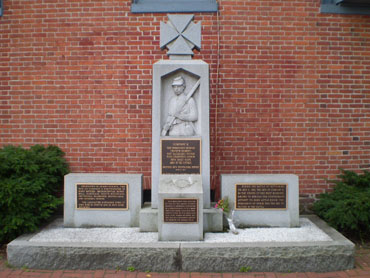
The Coster Avenue MuralDespite the fact that it is located only a few blocks northeast of the square at the dead-end of Stevens Avenue, this beautiful 80-foot long mural is unfortunately, one of the least visited sites of the battlefield. The large mural depicts the action on July 1 between Colonel Charles R. Coster's Brigade of the Union Army's XI Corps and Colonel Isaac Avery's and General Harry T. Hays' Brigades of the Confederate Army's II Corps. Painted by Johan Bjurman and Mark H. Dunkelman, the Coster Avenue Mural was dedicated on July 1, 1988, and then rededicated on October 13, 2002 after being restored. Due to additional weathering, it was replaced by the same artists in early October of 2015 using a new process in which digital photographs of the mural taken in 2001 were revised and used to digitally ‘paint’ the imagery on the back of 3/8” glass using ceramic inks.
If you look closely at the left corner of the mural, one of the Confederate soldiers is wearing a belt buckle with the “U.S.” upside down. This is not a mistake by the creators of the mural – I have heard and read that Confederate soldiers often wore captured Union belt buckles upside down as a sign of disrespect !!!
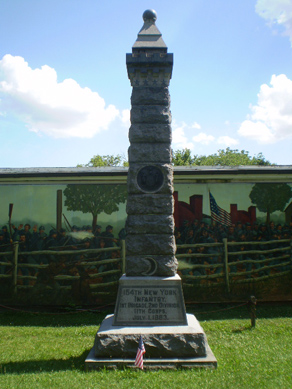
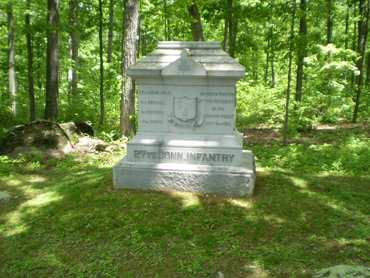
It should also be noted that two regimental monuments are located on Coster Avenue (roughly 20 yards wide and 110 yards long) – the monument to the 154th New York Infantry Regiment (also visible in the photo above) and the 27th Pennsylvania Infantry Regiment:
The other two regiments in that brigade, the 73rd Pennsylvania Infantry Regiment (positioned just north of the town square during this fighting) and the 134th New York Infantry Regiment (positioned to the right of and further east of the 154th New York Infantry Regiment), have their monuments on East Cemetery Hill.
It is interesting to note that the monument to the 154th New York Infantry Regiment mentions not only the number of casualties incurred at the Battle of Gettysburg, but also the number of soldiers (42) who later died in Confederate prisons (see the “Prisons and Prisoners” section on my “Newer Topics” page). According to Licensed Battlefield Guide Charles Fennell, this is the only regimental monument on the battlefield that does this.
There is one brigade monument that also mentions not only the number of casualties incurred during the Civil War, but also the number of soldiers in the brigade who later died in Confederate prisons --- that monument is the 1st Vermont Infantry Brigade monument located on Wright Avenue near Little Round Top and the Taneytown Road:
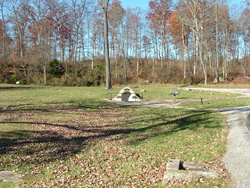
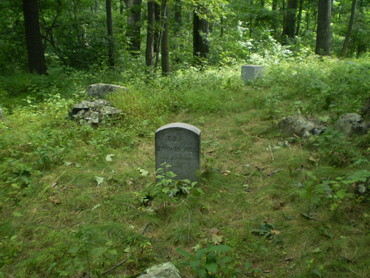
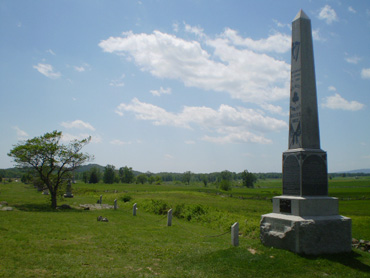
The Alms House CemeteryThe Alms House Cemetery, located on Howard Avenue just before you get to Barlow's Knoll, is another interesting stop worth making if you are exploring the terrain and action of the Union XI Corps on the afternoon of July 1. Although relatively tiny in size (about 43 yards by 94 yards and containing approximately 111 old tombstones) when compared to the Soldiers' National Cemetery or Evergreen Cemetery, and essentially a final resting place for the indigent (one tombstone is simply carved with "Unknown -- April 19, 1911 -- Drowned"), it is the burial site of at least one Civil War veteran, Isadore Keefer, and also an Army veteran of WWII as well. The cemetery is still in use today --- I saw at least four markers dated 2007 during my last visit there.
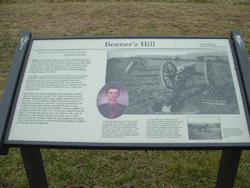
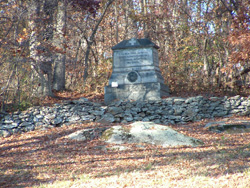
Benner's HillBenner's Hill, located about 1 mile east of Gettysburg on the south side of Hanover Road (Route 116), was the location of 16 guns of Confederate artillery under the command of a 19-year-old, Major Joseph W. Latimer, and the starting point for General Edward "Allegheny" Johnson's Division's evening attack on Culp's Hill on July 2. A heavy artillery exchange started around 4 P.M. and lasted for about 2 hours as the guns of "the Boy Major," despite their exposed position, attempted to "soften up" the Union positions on both Culp's Hill and Cemetery Hill prior to Lieutenant General Richard S. Ewell's attacks on those hills. Not surprisingly, the 24 or more Union guns on Culp's Hill, Cemetery Hill, and Powers' Hill finally got the best of Latimer's guns, which were ultimately forced to withdraw with the Major himself among the mortally wounded.
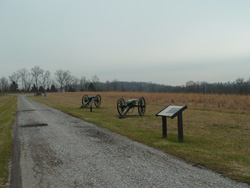
(Early 1900’s photo courtesy of Mike Waricher and the GNMP)Located on the north side of the Hanover Road (Route 116) is an even more forgotten artillery position probably because there is no park road and all 6 of the cannons have been removed for restoration. This area was where the 11 guns of Colonel William Nelson’s Artillery Battalion (Captain John Milledge Jr.’s Battery, Captain T. J. Kirkpatrick’s Battery, and Captain J. L. Massie’s Battery) were positioned on the afternoon of July 3 and participated briefly in the cannonade prior to Pickett’s Charge:
I was fortunate to participate in a "Battle Walk" in 2007 with Park Ranger Troy Harman that does not happen very often because it requires the prior permission of private landowners (see the The far right flank of the Union Army - the "lost avenue" section on this page). This particular walk, starting at Benner's Hill and lasting over three hours, retraced the steps of General Johnson's Division in their assault on Culp's Hill. I gained a greater appreciation for those soldiers, as our own group struggled (even with the assistance of a guide rope) down the surprisingly high and steep embankment to the edge of Rock Creek and crossing over it (luckily it had been a dry summer and the creek was extremely low) before continuing our trek up Culp's Hill. If you happen to be visiting Gettysburg whenever this "Battle Walk" is being offered (or the one for the "lost avenue"), make sure you take it --- you will be glad you did.
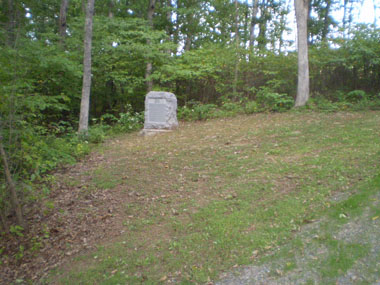
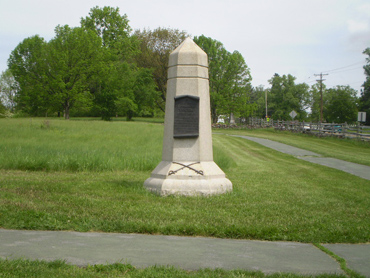
Brinkerhoff's RidgeLocated roughly halfway between Benner’s Hill and the East Cavalry Battlefield on the Hanover Road (Route 116) is an area known as Brinkerhoff’s Ridge, where heavy skirmishing occurred on July 2 from mid-morning until dusk between the “Stonewall Brigade” commanded by General James A. Walker that was protecting the left flank of the Confederate Army and Union cavalry in General David M. Gregg’s Second Cavalry Division that was protecting the right flank of the Union Army. This lengthy fight for Brinkerhoff’s Ridge prevented the “Stonewall Brigade” from being of any real help in the attack on Culp’s Hill until the morning of July 3.
There are two fine monuments on the north side of the Hanover Road approximately 1 mile apart to two of the Union military units which participated in that often overlooked action on July 2, the 10th New York Cavalry Regiment (approximately 1.3 miles east of Benner's Hill) commanded by Major Matthew H. Avery:
and the Second Section of Battery H of the 3rd Pennsylvania Heavy Artillery (approximately 2.3 miles east of Benner's Hill) commanded by Captain William D. Rank:
Daniel Lady farmThe Daniel Lady farm, located approximately .2 of a mile east of Benner's Hill on the north side of the Hanover Road (Route 116), served as the division headquarters and a field hospital of Confederate General Edward Johnson's Division. The 140+ acre farm was purchased at auction in 1999 by the Gettysburg Battlefield Preservation Association, which has made tremendous strides in restoring the farmhouse and barn to their 1860's appearance, both inside and out. The house and barn are normally open for public tours on weekends from April through December. For more information and photographs, go to the GBPA website at http://www.gbpa.org.
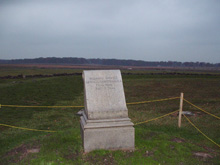
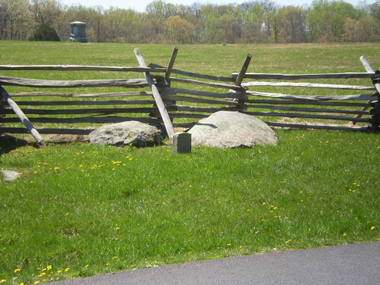
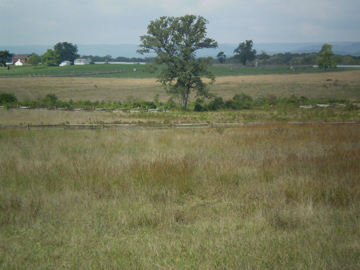
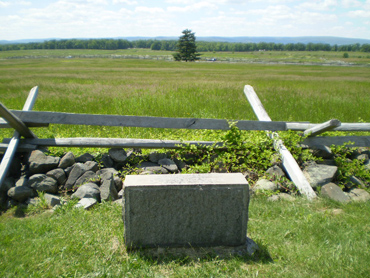
The battle for the Bliss farm on July 2 and 3The two-day struggle for control of the William Bliss farmhouse and barn, situated in "no-man's land" between Cemetery Ridge and Seminary Ridge west of the Emmitsburg Road, resulted in the farmstead changing hands between Union and Confederate troops about 10 times. Finally, both structures were intentionally torched by Union troops on July 3 in order to deprive the Confederates of a location for an observation post, advanced skirmish line, and a great position for sharpshooters. Neither buildings were rebuilt after the war, so all the visitor to the battlefield will see are the remnants of the typical earthen ramp leading up to the upper floor of the barn, three small Union markers to the 12th New Jersey Infantry Regiment, the 1st Delaware Infantry Regiment, and the 14th Connecticut Infantry Regiment (see the bottom three photos), and one small marker indicating the former location of the farmhouse. If you look to the west from the Emmitsburg Road, you can see the remnants of the earthen ramp and two of the three regimental markers (see the photograph directly below):
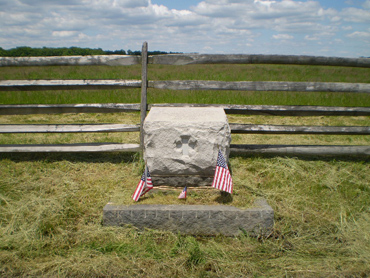
Pictured below is the marker indicating the former location of the house:
The fighting at the Bliss farm is depicted on a plaque on the front of the monument to the 12th New Jersey Infantry Regiment located along the west side of Hancock Avenue on Cemetery Ridge:
If you would like to learn more about this portion of the battle, I suggest reading "The Struggle for the Bliss Farm at Gettysburg" and “Fury on the Bliss Farm at Gettysburg” (see my "Books Worth Reading" page).
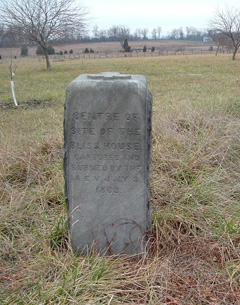
Confederate burning of civilian propertyIt should be noted that Confederate troops did burn down civilian property during the fighting on July 1, 1863. Two companies of the 20th New York State Militia (also known as the 80th New York Infantry Regiment) had been ordered to occupy the farm buildings of Emmanuel Harman and for a period of time exchanged firing with Confederate troops in General James J. Pettigrew’s Brigade in General Henry Heth’s Division of General A. P. Hill’s III Corps. Around 2:30 P.M., Pettigrew’s troops drove forward and pushed the Union troops from their front. To ensure that the Harman’s farm buildings could not be used again for cover by Union soldiers, Pettigrew’s men (reportedly Colonel James Marshall and his 52nd North Carolina Infantry Regiment) burned the buildings down as they passed by. In addition, the barn of the John Herbst farm just to the south and on the other side of Willoughby Run was also burned to the ground, probably by that same regiment.
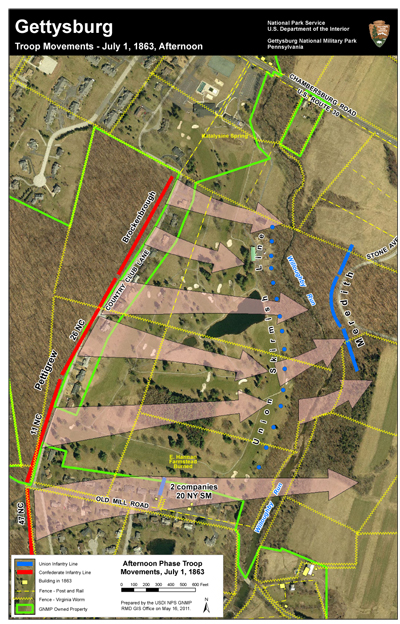
(Map courtesy of the GNMP)
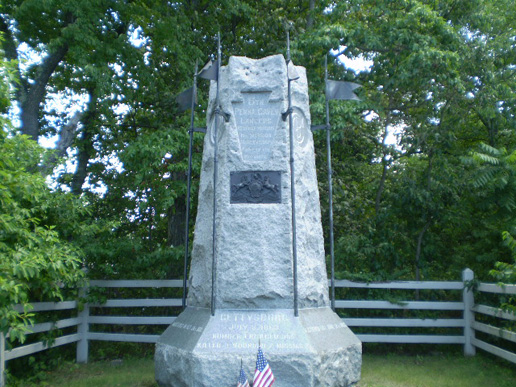
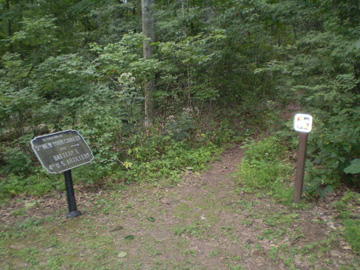
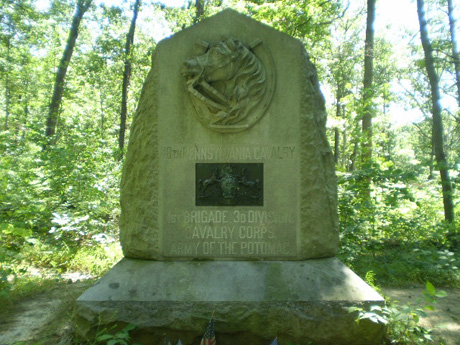
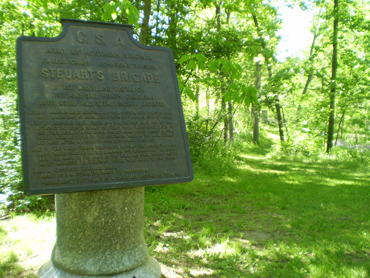
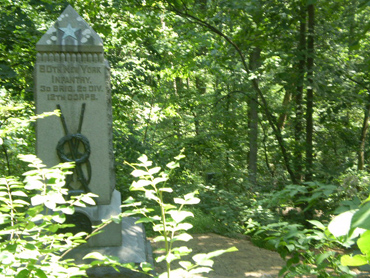
The East Cavalry BattlefieldWhile this portion of the battlefield is better known than most, if not all, of the areas and locations on this page, it is still not an area visited by many tourists since it is 3 miles east of the main portion of the park. Nevertheless, it is the site where Confederate General J.E.B. Stuart's cavalry troops ran into Union cavalry on the afternoon of July 3, reportedly trying to attack the Union rear while Pickett's Charge was occurring. In any event, there are several monuments in this area, one of which honors both sides of the cavalry engagement (see the left photo below), and the monument that is even farther behind it (see the photo below on the right) and even less visited is to the 3rd Pennsylvania Cavalry. For the interesting role that regiment played, read further down on this page under the "Lesser known and visited monuments and small markers" section.
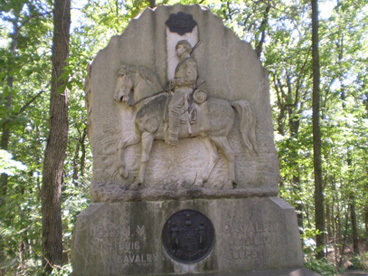
On the south side of Gregg Avenue is Custer Avenue, with its monument to the cavalry regiments from Michigan that saw action here. On the one side of the monument is an excellent likeness of their young commander, Brigadier General George Armstrong Custer:
There is also a small cavalry plaque that is nearby on the east side of the East Cavalry Battlefield. Located approximately .8 of a mile north of the Hanover Road (Route 116) on the east side of Low Dutch Road, the marker indicates the approximate location of the far right flank of the Union cavalry held by the 3rd Pennsylvania Cavalry Regiment on July 3:
The plaque mentions the critical charge made by Captain William E. Miller's battalion of that regiment on that day (for more information, see the section below on this page dealing with lesser known or visited monuments and small markers to individual soldiers).
There is also a small marker that is often overlooked as well, and is located approximately 1.6 miles east of Benner’s Hill on the northwest corner of the “T” intersection of the Hanover Road (Route 116) and Hoffman Road. The marker describes the Union cavalry action on July 2 in the fight for Brinkerhoff’s Ridge and the action on the far right flank on July 3:
The South Cavalry Battlefield --- the other cavalry action on July 3In addition to the famous cavalry action 3 miles east of town on the afternoon of July 3 involving Confederate General J.E.B. Stuart's troops and Union General David M. Gregg's troops that included George Armstrong Custer, there was another charge later that day on the far left of the Union flank in the area of the John Slyder farm. Located on the north (left) side of South Confederate Avenue just before you reach the base of Big Round Top, there is a small parking area on the right side of the road:
After Pickett's Charge had been repulsed, Union General Elon Farnsworth's Brigade of General Judson Kilpatrick's Cavalry Division was ordered by General Kilpatrick to launch a mounted attack against the right flank of the Confederate Army west of Big Round Top and in the vicinity of the John Slyder farm. The purpose of the attack is still being debated as to whether or not it was to serve as a strong diversion and/or a reconnaissance mission, but a mounted cavalry attack over such rocky and difficult terrain (I have walked that area this fall and can attest to that fact) was questioned by General Farnsworth and his men. General Kilpatrick (often negatively referred to as "Kill-Cavalry" by his men) reportedly responded by saying that if General Farnsworth would not lead the charge, then he himself would lead it. His bravery now in question, General Farnsworth personally lead the third and last wave of the assault with approximately 300 men of the 1st Vermont Cavalry Regiment, losing his own life along with 64 other casualties. The ill-fated attack has had its own share of controversies over the years, including an unconfirmed account or version of the story that had General Farnsworth committing suicide with his own pistol in order to avoid being captured. To read a more detailed account, visit http://www.freerepublic.com/focus/f-vetscor/1627479/posts, and to read a "contrarian" view by Licensed Battlefield Guide Andrea "Andie" Custer, go to her interesting article which can be found at http://www.bluegraymagazine.com/farns/farns1.html. I would also recommend reading "Gettysburg's Forgotten Cavalry Actions" by Eric Wittenberg (see my "Books Worth Reading" page).
As you continue on South Confederate Avenue across the stone bridge and around the bend, slowly climbing northward along the western base of Big Round Top, you will see a large field off to your left. Known as the “D-shaped field,” it is the location of the monument to the 1st Vermont Cavalry Regiment and the approximate location where the official accounts reportedly indicate that General Farnsworth was killed. The monument is about 55 yards off the road and is easily accessible by the path visible in the photo on the left below:
There is much more to the South Cavalry Battlefield than just the area around and north of South Confederate Avenue in the vicinity of the John Slyder farm discussed above. In fact, if you look closely at the "Touring the Battlefield" map available from the National Park Service (see my "Reference Map" page), you will see there is a large area to the south that extends on both sides of the Emmitsburg Road. This area was the position held on the afternoon of July 3 by General Wesley Merritt's Reserve Brigade of General John Buford's Cavalry Division after it was brought up from Emmitsburg. The brigade, consisting of 5 regiments (the 1st, 2nd, 5th, and 6th U.S. Cavalry, and the 6th Pennsylvania Cavalry), covered the far left flank of the Union Army and then, after sending the 6th U.S. Cavalry to intercept a Confederate wagon train reported to be in the vicinity of Fairfield, supported the cavalry attack by General Farnsworth with the assistance of the 1st U.S. Artillery, Battery K, of the Horse Artillery, commanded by Captain William M. Graham. The majority of the monuments to these regiments are located in an L-shaped field roughly 20 yards wide and 120 yards long that is located on the east side of the Emmitsburg Road about 1.2 miles south of where it intersects South Confederate Avenue:
However, to get to the monument to the 1st U.S. Cavalry Regiment, you must follow a footpath as indicated by a sign shown below for about 90 yards (the sign is located to the right of the monument in the photo on the left above):
The monument to the 6th Pennsylvania Cavalry Regiment, also known as "Rush's Lancers," is located on the same side of the road about .3 of a mile to the north:
For more information on "Rush's Lancers," go to the website at http://www.rushslancers.com, or read the book "Rush's Lancers: The Sixth Pennsylvania Cavalry in the Civil War," written by Eric J. Wittenberg and published by Westholme Publishing.
Another overlooked portion of the South Cavalry Battlefield is Bushman Hill, located west of Big Round Top on the south side of South Confederate Avenue. The site where the 5th New York Cavalry Regiment was positioned prior to its participation in General Farnsworth's attack and where Battery E of the 4th U.S. Artillery was placed to help support the attack, the summit of Bushman Hill where the monuments to these to units are located can be reached by way of three different footpaths. The one footpath (see the photo below on the left) begins about 30 yards past the statue of Major William Wells, who took command of the 1st Vermont Cavalry Regiment after General Farnsworth was killed. The other path (see the photo below on the right) begins about 200 yards before the parking area where the interpretive markers are located (see the first two photos at the beginning of this section):
I prefer a third footpath, located to the left of the horsepath/farmlane at the edge of the woods in the photo below (see the "The far right flank of the Confederate Army --- South Confederate Avenue" section further below on this page):
This path will take you past the monument to General Judson Kilpatrick's Division and then past the monument to the 18th Pennsylvania Cavalry Regiment commanded by Colonel William P. Brinton, another regiment involved in the attack:
After a moderate climb of about 400 yards, you will reach the monuments to the 5th New York Cavalry Regiment commanded by Major John Hammond, and Battery E of the 4th U.S. Artillery commanded by Lieutenant Samuel S. Elder:
There are other less visited cavalry monuments and markers in the general vicinity as well. Located on the west side of the Emmitsburg Road roughly .2 of a mile south of the monument to the 6th Pennsylvania Cavalry Regiment shown above on this page is a marker pointing to the position of detachments of both the 1st U.S. Cavalry Regiment commanded by Captain Richard S. C. Lord and the 2nd U.S. Cavalry Regiment commanded by Captain T. F. Rodenbough on July 3. The actual marker is located roughly 250 yards down the 15-yard wide grassy lane that is about 400 yards long. If you walk roughly another 50 yards past this marker, you can find the left flank marker for the 6th U.S. Cavalry Regiment commanded by Major James H. Haseltine along the north side of the lane (the right flank marker is located on private land about 50 yards off the road roughly 25 yards southeast of their regimental monument shown above on this page):
Much more difficult to find (and without a really good and safe place to park) are the marker and the monument off of Ridge Road (about .2 of a mile north of the monument to the 6th Pennsylvania Cavalry Regiment shown above on this page) roughly .2 of a mile east of the “T” intersection with the Emmitsburg Road. This other marker for detachments of both the 1st U.S. Cavalry Regiment commanded by Captain Richard S. C. Lord and the 2nd U.S. Cavalry Regiment commanded by Captain T. F. Rodenbough can be found roughly 300 yards to the east side of the bend in the road at the end of a 15-yard wide semi-winding grassy lane:
The monument to the 5th U.S. Cavalry Regiment commanded by Captain Julius W. Mason can be found roughly 300 yards further to the southwest on the other side of the road at the end of a similar 15-yard wide semi-winding grassy lane:
The North Cavalry Battlefield --- the cavalry action at Hunterstown on July 2Around 1:30 P.M. on July 2, the Union Signal Corps station on Little Round Top reported that approximately 10,000 Confederate infantry troops were moving northward. As a result, General Meade ordered Union cavalry northward to the area of Hunterstown in anticipation of a possible Confederate assault on his right flank. While history has proved that what the Union Signal Corps station had actually seen was Longstreet's countermarch as he prepared to attack the Union left flank, the timely shifting of Union cavalry prevented J.E.B. Stuart's cavalry from supporting the Confederate attack on Culp's Hill.
Howe AvenueHowe Avenue, located off Taneytown Road behind Big Round Top, is another one of the many overlooked areas of the battlefield, apparently because it was not the scene of any real fighting. It is still a nice "out of the way" place to visit, perhaps have a picnic, and maybe contemplate what the troops of the Union VI Corps stationed there in reserve to cover the flank of the Union Army were truly thinking --- I wonder how many of them were really disappointed that they did not see any combat, and how many were honestly relieved that they did not. Something to ponder, don't you agree? For more information about the troops stationed there and the vital role they played, go to the “The refusal of the extreme left flank of the Union line on July 2” section of my “Battle Walks” page.
The two "Springs"While many people have heard of and/or visited "Spangler's Spring," located in the swale of Culp's Hill (see the photos below), there is another "spring" that provided water for Union soldiers on the northern part of their line.
It should be noted that there used to be two springs at Spangler’s Spring as shown in the photo below. The spring on the right was used for horses, but it is my understanding that since it was uphill from the spring used for people, it was eventually closed up to avoid tourists from possibly becoming ill from the water becoming contaminated by horses.
(Photo courtesy of Mike Waricher and the GNMP)Located east of Cemetery Hill along Wainwright Avenue (known previously during that era as Brickyard Lane or Winebrenner's Lane), Menchey's Spring is easy to find and also makes a great spot for a picnic. I have not found much about Menchey's Spring in any of the books I have read, but did see references to "Menchey's sand hole" on the Internet, and am still researching this.
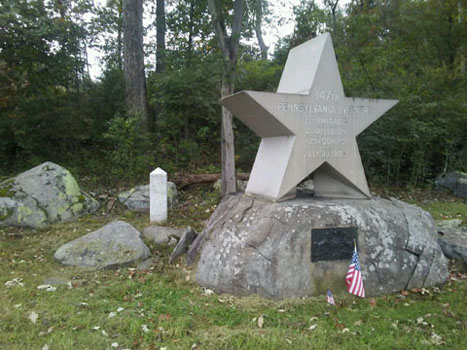
"Pardee Field and Spangler's Meadow"While many people stop at Spangler's Spring, not everyone pays attention to the small grassy meadow south of the spring. During the fighting for Culp's Hill, Union troops of Major General Henry W. Slocum's XII Corps attempted several times on the early morning of July 3 to retake their captured trench works which they had vacated on July 2 after being ordered to reinforce Major General Dan Sickles' III Corps on the left flank. One attack just northwest of Spangler's Spring by the 147th Pennsylvania Infantry Regiment, led by Lieutenant Colonel Ario Pardee, was only partially and temporarily successful, with the field which they charged across later named "Pardee Field":
Another attack from the south of Spangler's Spring made by the 2nd Massachusetts Infantry Regiment and the 27th Indiana Infantry Regiment under the command of Colonel Silas Colgrove proved to have disastrous results for the troops from Indiana. Ordered to charge roughly 100 yards across the open meadow to attack Confederate troops behind a stone wall and among boulders, the Indiana regiment was only able to make it about halfway before being ordered to withdraw 15 minutes later, and suffering roughly 30% in casualties. A small stone marker stands in the middle of the meadow (visible toward the left in the photo on the left) marking the farthest point reached in the murderous charge, which one Union officer who previously said the order was just that (and died in the attack as well) --- murder.
For one detailed account of this controversial charge, read "Gettysburg: Day Three" by Jeffry Wert (see my "Books Worth Reading" page).
Spangler's LaneA nearby farm lane that played a small role for Union troops on Culp’s Hill was Spangler’s Lane on Henry Spangler’s farm. The farm lane was used by regiments such as the 111th Pennsylvania Infantry Regiment to get from the Baltimore Pike to their defensive positions in and near the “saddle” of Culp’s Hill. To view traces of the former fence-lined lane over 300 yards long, look toward the southwest between the monument to the 5th Ohio Infantry Regiment and the large boulder roughly 15 yards behind it with the small bronze plaque containing an owl (see the “Other monuments with animals” section on my “Something Different” page):
(view looking to the southwest)
(view looking to the northeast)
For more information, I recommend reading “Culp’s Hill at Gettysburg: The Mountain Trembled” (see my “Books Worth Reading” page).
The “first shot marker”Located on U.S. Route 30 approximately 1.8 miles west of the statue on McPherson's Ridge of Union General John Buford is a small marker on the property owned by Ephraim Wisler at the time of the battle that indicates the location where Union Lieutenant Marcellus Jones, of the 8th Illinois Cavalry Regiment commanded by Major John L. Beveridge as part of Colonel William Gamble’s First Brigade in General Buford’s Division, reportedly fired the first shot of the battle around 7:30 A.M. on the morning of July 1 at Confederate troops as they crossed Marsh Creek along the Chambersburg Road. According to accounts, it was not even his own weapon that he used --- he took a carbine from one of his own men, Sergeant Levi Shaffer, and fired the first shot before ordering his men to fall back to the next line of defense.
(Photo circa 1910 courtesy of J. David Petruzzi)
(Photo courtesy of the Adams County Historical Society)To locate the marker, as you are heading west on Route 30, look for Knoxlyn Road to the left (there is no signal light at that "T" intersection) --- the marker is directly across the road to the right on the north side of Route 30.
It should be noted that the claim of who fired the first shot was disputed by the 9th New York Cavalry Regiment commanded by Colonel William Sackett as part of Colonel Thomas C. Devin’s Second Brigade in General Buford’s Division. They claimed that at 5:00 A.M., Corporal Alpheus Hodges of Company F was fired upon by Rebel pickets while on his vedette post west of Willoughby Run. When the regiment’s monument committee appeared before the Board of the Gettysburg Battlefield Memorial Association, the board voted unanimously to allow the regiment’s inscriptions on their monument, recording the following in its published proceedings:
"At a meeting held July 3, 1888, a committee of the Ninth New York Cavalry appeared before the board, and established to the entire satisfaction of those present that this regiment fired the first shot of July 1, 1863."On the back of their monument is this inscription: "POSITION 8 A.M. JULY 1ST 1863. PICKET ON CHAMBERSBURG ROAD FIRED ON AT 5 A.M."
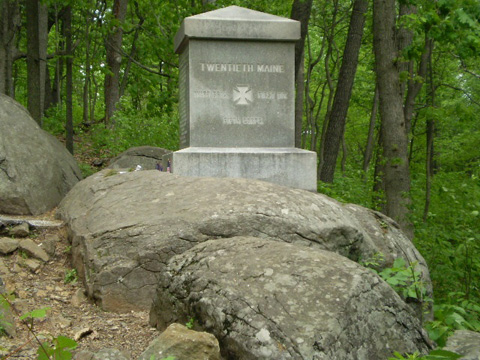
The far left flank of the Union Army --- Company B - 20th Maine Infantry RegimentMuch has been written, and rightfully so, about Colonel Joshua Chamberlain's regiment, the 20th Maine Infantry Regiment, anchoring the left flank of the Union line on July 2, 1863. What is not as well known is the fact that Company B of that regiment, under the command of Captain Walter G. Morrill, was placed even further to left of the regiment's left flank about 100 yards away behind a stone wall. I have often thought about how those men felt out there in those dense woods, detached from the rest of their regiment and all alone. To be in that situation had to be nerve-wracking, to say the least, to be at the very end of the very end of the left flank of the entire Union Army.
There is a small marker honoring those brave men, and it is not as difficult to get to as it once was. When you get to the monument for the 20th Maine Infantry Regiment on Little Round Top, walk down the path to the right toward Wright Avenue and the mini-parking lot located there. Just before you get to the road, you will see several trails heading toward the left. Take the far right trail and go roughly 100 yards --- you will see the marker on the right and in front of a stone wall. Then ponder, as I do when I visit there, how you would have felt out there on July, 2, 1863.
The other monument to the 20th Maine Infantry RegimentAny Battle of Gettysburg buff who visits the battlefield more than likely takes the time to walk the short path on the southern spur of Little Round Top to see the small monument to the 20th Maine Infantry Regiment and Colonel Joshua L. Chamberlain:
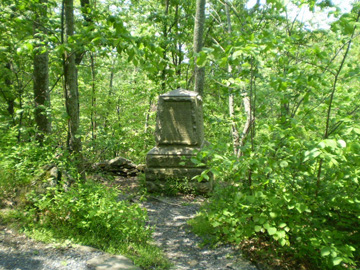
I would venture a guess that very few of those visitors know of, let alone visit, the other similarly sized monument to that same regiment and which is located approximately 75 yards below the summit of Big Round Top. This other monument indicates the defensive position taken after their successful and famous defense of Little Round Top:
What might have beenOne of the many Union regiments that participated in the fierce defense of Little Round Top on the late afternoon and early evening of July 2 was the 16th Michigan Infantry commanded by Colonel Norval E. Welch. The 16th Michigan Infantry Regiment was one of the four regiments in Colonel Strong Vincent’s Third Brigade in General James Barnes’ First Division of General George Sykes’ Union V Corps, the other regiments being the 20th Maine Infantry Regiment, the 44th New York Infantry Regiment, and the 83rd Pennsylvania Infantry Regiment.
The 16th Michigan Infantry Regiment sent out two companies as skirmishers, Company A and the Michigan First Company of Sharpshooters (known as Brady’s Sharpshooters), and immediately encountered enemy fire. According to Colonel Welch’s Official Report of July 6, his troops “remained in position for nearly half an hour when someone called from the extreme crest of the hill to fall back nearer the top where a much less exposed line could be taken up.” Some of the regimental color guard and roughly 40 other soldiers obeyed this “order” while the remaining men held their positions (see the “Other monuments that have been moved” section of my “More Odds and Ends” page).
While it is true that the regiment fought that day on the extreme right flank of the brigade, it was originally ordered by Colonel Vincent to form on the extreme left flank of the brigade. For some reason, however, Colonel Vincent soon changed his mind and ordered the 20th Maine Infantry Regiment to instead take the extreme left flank of the brigade (and of the entire Union Army), and as they say, the rest is history.
It should also be noted that the 16th Michigan Infantry Regiment, originally formed in September of 1861, served in over 50 other engagements and major battles during the war including the Battles of Antietam, Fredericksburg, Chancellorsville, the Wilderness, Spotsylvania, and Petersburg. Sadly, Colonel Norval E. Welch (shown below) was killed in action on September 30, 1864. I can’t help but wonder if he and many of his men thought of the glory bestowed upon Colonel Joshua L. Chamberlain and the 20th Maine Infantry Regiment for successfully defending the extreme left flank of the Union Army at Gettysburg and “what might have been” if the 16th Michigan Infantry Regiment had not been moved to the right ...
Colonel Norval E. Welch
(Photo courtesy of the USAMHI)
The "Joshua Chamberlain and the 20th Maine" of Culp's HillThere was a colonel - Colonel David Ireland - and a regiment - the 137th New York Infantry Regiment - who also played a similar critical role that day on July 2 and helped save the right flank of the Union Army in defending another hill - Culp's Hill. Colonel Ireland's regiment belonged to the only brigade (General George S. Greene's Third Brigade) of the Union XII Corps left to defend Culp's Hill after the rest of the Corps was sent to reinforce Union troops defending against General Longstreet's Confederate assault on the left flank. Assigned to defend the far right end of the line, Colonel Ireland's 137th New York Infantry Regiment covered approximately twice the amount of ground with about the same number of troops, also refused their line, and even had a smaller scale bayonet charge. However, like so many others, this valiant effort is often completely overlooked when studying the battle. In this particular case, this may be partially because Colonel Ireland did not survive the war, sadly dying of dysentery in 1864. I am sure that many visitors to Culp's Hill, in their haste to reach the summit and the observation tower there, hardly glance at the monument to the 137th New York Infantry Regiment and to Colonel David Ireland:

(Photo courtesy of the USAMHI)The far right flank of the Union Army - the "lost avenue"
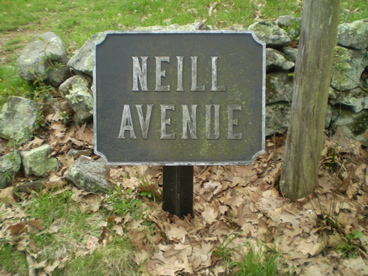
The far right flank of the Union Army, located east of the Baltimore Pike and Rock Creek and southeast of Culp's Hill, is located on land that is an official part of the park known as Neill Avenue, named after Union Brigadier General Thomas H. Neill, the commander of the Third Brigade, Second Division, of Major General John Sedgwick's VI Corps. Neill's men covered the right flank and protected the communication/supply line to Westminster that the Baltimore Pike served as. However, Neill Avenue is landlocked by private property and not routinely accessible to battlefield visitors, and is therefore also known as the "lost avenue."
Fortunately, there are occasional "Battle Walk" tours available through the National Park Service that are arranged with the primary owner of the surrounding land, Mr. Dean Shultz. I was fortunate to go along on one of these tours two years ago and met Mr. Shultz, one of the most knowledgeable and friendliest people I have ever met in the Gettysburg area. The avenue is still a grassy lane, and has several regimental monuments as well as a marker stating that this was indeed the far right flank of the Union Army.
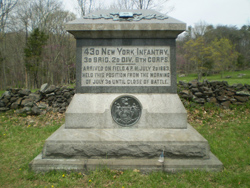
With the assistance of Licensed Battlefield Guide and friend George Newton and Dean Shultz’s gracious permission, I was able to arrange a long-awaited special return visit to Neill Avenue with several fellow Battle of Gettysburg buffs in April of 2009. It was like going back in time to see what an avenue of the Park originally looked like so long ago. Located on a ridge, Neill Avenue is roughly 10 yards wide and 250 yards long on the southern side of Wolf Hill and about 600 yards from the Baltimore Pike, and is the location of the monuments to four of the five regiments in General Neill’s Brigade. The other regiment was the 77thNew York Infantry Regiment, which was on detached duty as support for the Union batteries on nearby Powers’ Hill (see the “Powers’ Hill” section on this page). Shown below from roughly west to east on the ridge are the monuments to the 49th New York Infantry Regiment, the 7th Maine Infantry Regiment, the 43rd New York Infantry Regiment, and the 61st Pennsylvania Infantry Regiment -- the far right flank of the Union Army.
(William H. Tipton photo)
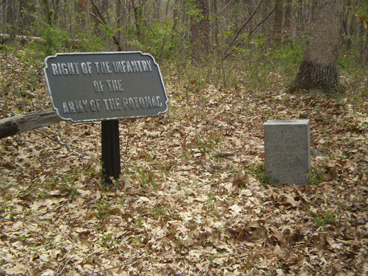
Here are additional photos, including the marker indicating this location as the far right flank of the Union Army (an inscription to that effect also appears on one side of the monument to the 61st Pennsylvania Infantry Regiment):
(view from the west end of Neill Avenue)
(view from the east end of Neill Avenue)
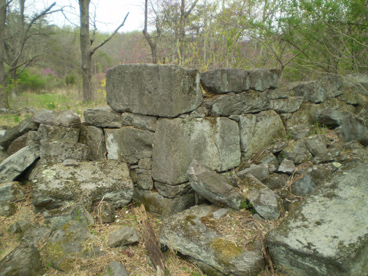
An added bonus was an excursion further north past the remnants of the dam on Rock Creek used for McAllister’s Mills (the grist mill just below the dam and the saw mill that was located farther downstream across from the George Musser farm) and then over to see the remains of the foundation of the Zephaniah Taney farmhouse on the east side of Rock Creek where Confederate infantry (primarily the 2nd Virginia Infantry Regiment) kept up skirmish firing on July 3 on not only General Neill’s troops but also on Union troops in the area of Spangler’s Meadow below Culp’s Hill:
(William H. Tipton photo)If you ever get the opportunity to visit Neill Avenue, whether it be on a rare National Park Service Battle Walk or on a specially arranged tour, I strongly urge you to do so !!!
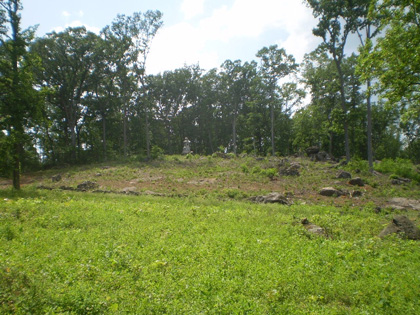
Powers' HillIn addition to Cemetery Hill, Culp's Hill, Little Round Top, and Big Round Top, there are a few other hills that, although not as well-known or visited, also played a role in the battle. One of these is Powers' Hill, located southwest of Culp's Hill and behind the center of the Union lines. Used as a Union Signal Station and an artillery platform to fire on Confederate batteries on Benner's Hill (and where General Meade temporarily made his headquarters during the 2-hour artillery duel preceding Pickett's charge on July 3), Powers' Hill is often overlooked as a place to visit and explore. Easily accessible off Granite School House Lane, a road which connects the Baltimore Pike and Taneytown Road (thus making it a vital route for Union troops throughout the battle), Powers' Hill has a few monuments worth exploring. However, there is no parking lot so you will have to park along the road and then have to do some walking up the hill and over the stone wall where the monument to the 77th New York Infantry Regiment is located (see the left photo below). In my opinion, it is worth the effort to learn more about this often overlooked area of the battlefield and its few, but interesting, monuments like the one to Knap's Independent Battery E, Pennsylvania Light Artillery (see the right photo below).
During 2012 and 2013, much of the eastern side of Powers’ Hill was restored by the National Park Service to what it looked like during the battle, thus providing a better understanding of why Powers’ Hill was important as a location for Union artillery to cover Culp’s Hill.
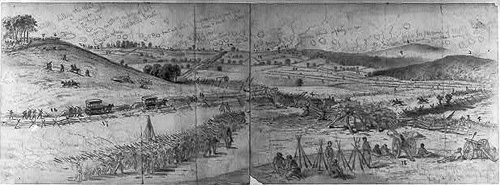
Sketch and painting by Edwin Forbes entitled “General View of the Union Lines on the Morning of July 3, 10 AM, During the Attack of Johnson’s Div. C.S.A.” (Powers’ Hill is depicted on the left)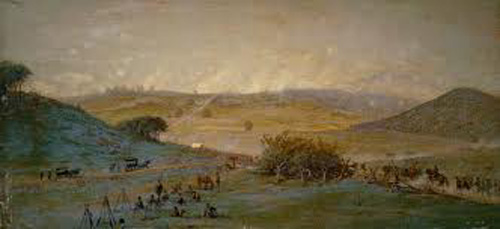
The far right flank of the Confederate Army --- South Confederate AvenueThere is a small marker on the south side of South Confederate Avenue simply stating that this area was the location of the far right flank of the Confederate Army:
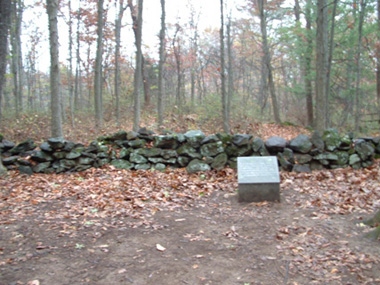
Approximately 200 yards further on the right and at the edge of a tree line (visible in the upper left corner of the left photo above) is a long stone wall as you approach the base of Big Round Top. This stone wall was where the 1st Texas Infantry Regiment of General Jerome B. Robertson's Brigade was positioned after the attack on Little Round Top on July 2 and where they helped repulse the ill-fated Union cavalry charge by General Elon Farnsworth on July 3 after Picketts' Charge was over.
The stone wall was not easily visible until recent years when the National Park Service began its long-term efforts to return many of the critical areas of the battlefield as much as possible to what they looked like in 1863 (see my "Newer Topics" page). What I find very interesting is that if you follow it southward for about 200 yards, you will find what appears to be a makeshift "shooting platform" of small rocks piled atop a ledge with a small firing "slot" where a soldier could sit or lie comfortably and shoot at the enemy. In any event, this type of ingenuity no doubt occurred elsewhere on the battlefield, but this is one example that has survived for 145 years.
Jones Avenue - the Confederate "lost avenue" ???While Jones Avenue is not landlocked by private property like Neill Avenue, I think a strong case can be made for referring to it as the Confederate "lost avenue" because of its location. In fact, although I had often seen the stone marker to Lieutenant Colonel Hilary P. Jones' Artillery Brigade of General Jubal Early's Division of General Richard S. Ewell's II Corps, located just a few miles north of town past Barlow's Knoll when visiting relatives in the area, I never realized until this spring that the narrow macadam-style road to the right of the marker was not a private lane but was actually part of the park. The lane itself is only .3 of a mile long and ends in a "turnaround" loop, but it normally has 5 cannons on display along with separate markers for each of the 4 batteries (Carrington's, Garber's, Green's, and Tanner's). The cannons are among the 150 that are still in the process of being restored by the National Park Service (see my "Odds and Ends" page).
To get to Jones Avenue, take the Old Harrisburg Road north of town past Barlow's Knoll and go about .5 miles further after passing Rock Creek. The narrow lane (visible on the right in the left photo above) will be on the right (east) side of the road.
The Salem Artillery markerThere is an even more obscure and isolated Confederate marker than the ones on Jones Avenue mentioned above, and that is the one to Captain Abraham Hupp's Battery of the Salem Artillery in General Richard S. Ewell's Artillery Reserve. Located on a small bluff several hundred yards east of the famous "railroad cut," the battery was placed there to support the attack on Cemetery Hill (seen in the background of the left photo below). Although there were a few cannons (at least two) placed near the marker in the past, they were later removed for fear of vandalism or theft due to their extremely isolated position.
To find this lone marker and get a great view of Cemetery Hill in early spring, head out of town on the Chambersburg Road (Route 30 West) and park along the north (right) side of the road about 100 yards past General Lee's former headquarters at the Mary Thompson house. Take the path that looks like an old driveway about 100 yards, cross the railroad tracks, and then turn right. Carefully walk along the slowly rising embankment until you find a narrow footpath. Go roughly another 75 yards and you will find the marker and an excellent springtime view of Cemetery Hill. Remember to be careful as you walk along the north side of the embankment !!!
Sachs BridgeAlthough not really involved in the battle, Sachs Bridge was crossed by some units of the Union Army as well as by many Confederate soldiers, especially during their retreat back to Virginia. Because of stories that three Confederate deserters were caught nearby and later hung inside, the 100-foot long bridge is said to be haunted.
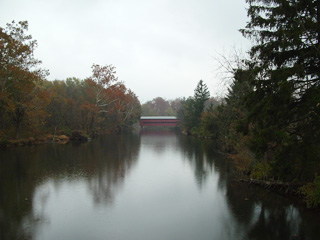
To get to Sachs Bridge, take Millerstown Road west from West Confederate Avenue on Seminary Ridge (turn right at the 4-way intersection --- it is just before the observation tower near Confederate General James Longstreet's headquarters. You will pass the entrance to the Eisenhower National Historic Site on the left, and the road will become Pumping Station Road. Continue onward, and cross Marsh Creek (as you do so, the bridge will be visible in the distance on your left). Take the first road to your left (Waterworks Road) and go about 300 yards. The bridge is closed to vehicles, so park in the small parking area on the right or along the road.
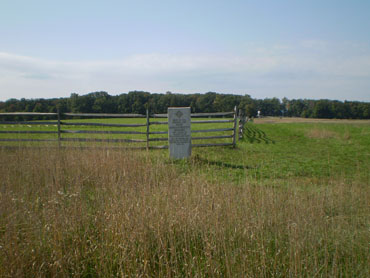
Lesser known and visited monuments and small markersAn often overlooked monument in the area of the Wheatfield is the monument to the 6th Pennsylvania Reserves, also known as the 35th Pennsylvania Infantry Regiment (see the "The "Rule of 29" and the Pennsylvania Reserves" section on my "Odds and Ends" page). Commanded by Colonel Wellington H. Ent, the regiment was part of Colonel William McCandless' First Brigade of General Samuel W. Crawford's Division in General George Sykes' Union V Corps and was one of the many units sent in as reinforcements late in the afternoon of July 2. The monument is located roughly 60 yards north of the "T" intersection of Ayres Avenue and the Wheatfield Road:
An often overlooked marker is the small tablet for the 4th Alabama Infantry Regiment commanded by Colonel L. H. Scruggs. As part of General Evander M. Law's Brigade in General John B. Hood's Division of General James P. Longstreet's I Corps, the regiment participated in the attack on Little Round Top on July 2. While all the Confederate infantry brigades have similar but larger tablets on the battlefield, the 4th Alabama Infantry Regiment is the only Confederate infantry regiment with its own individual (although smaller) tablet. The tablet is located on the west side of South Confederate Avenue approximately .3 of a mile south of the intersection with the Emmitsburg Road and roughly 75 yards north of the Alabama Monument (seen in the top left photo below):
IndividualsAmong the lesser known and visited smaller monuments and markers like the small marker for Company B of Colonel Joshua Chamberlain's 20th Maine Infantry Regiment mentioned on this page, there are a few that were placed in honor of individual soldiers, and not just generals or colonels. That being said, not all the monuments to generals or colonels were that large. In addition to the ones on Cemetery Ridge indicating where Union General Winfield S. Hancock was wounded (the left photo below) and where Confederate General Lewis A. Armistead was mortally wounded (the middle photo below) during Pickett's Charge, there is a smaller marker for a Union artillery officer, Lieutenant Alonzo B. Cushing, of the 4th U.S. Artillery, Battery A, who later died after being wounded five times while attempting to repulse General Armistead's attack:
In addition to the rock carving on the summit of Little Round Top regarding the wounding of Colonel Strong Vincent, commanding the Third Brigade of the First Division of General George Sykes’ Union V Corps (see the “Rock carvings and inscriptions” section on my “Something Different” page), there is a small stone marker (which used to face in the opposite direction) roughly 40 yards further south that reportedly marks the location where Colonel Vincent fell mortally wounded on July 2:
Just after you round the sharp bend on Ayres Avenue as you approach Houck’s Ridge with its fine view of Little Round Top, you can see a small solitary monument only a few yards off of the north side of the road. That monument marks the approximate location where Colonel Charles F. Taylor, while commanding the 13th Pennsylvania Reserves, was shot and killed during the whirlwind fighting for control of the Wheatfield on July 2:
(Photo courtesy of the USAMHI and Don Wiles)There is an even smaller tablet for Colonel Henry C. Merwin, who was the commander of the 27th Connecticut Infantry Regiment, that is located on the south side of Wheatfield Road:
(Photo courtesy of the USAMHI and Don Wiles)A small monument that is extremely difficult to find is the one to Colonel George L. Willard, the commander of the 125th New York Infantry Regiment and who was also in charge of the entire Third Brigade of General Alexander Hays' Division of the Union Army's II Corps. Colonel Willard was killed by artillery fire on the afternoon of July 2 during his brigade's timely counterattack against Confederate infantry being led by General William Barksdale which was advancing from the Peach Orchard toward Cemetery Ridge. To locate the monument, walk west from the Pennsylvania Monument approximately 350 yards, crossing over two fences to the hedgerow along Plum Run:
(Photo courtesy of the Library of Congress and Don Wiles)There are even small markers or tablets on the battlefield for captains and sergeants. One of them is to Captain Jedediah Chapman, another casualty of the 27th Connecticut Infantry Regiment, and it is located on the north side of DeTrobriand Avenue:
(Photo courtesy of the USAMHI and Don Wiles)
It is interesting to note that Captain Chapmans marker was originally placed on the south side of Wheatfield Road near the small marker for Colonel Henry Merwin (as seen above on this page), his regimental commander who was also killed on July 2, 1863. It is my understanding that the original property owner where Captain Chapman was actually killed wanted too much money, but later (perhaps a new property owner ???), a deal was made and the marker moved to the correct location where it can be seen today.
(William H. Tipton photo)Another marker for a captain, Captain Henry V. Fuller of the 64th New York Infantry Regiment, is much more difficult to find. It is located approximately 40 yards off the trolley path by heading north toward the Wheatfield on the west bank of Plum Run, and is easier to spot during the fall. As you come around the bend in the road south of the Wheatfield where Cross Avenue becomes Brooke Avenue, park along the road before you get to the small bridge and take the path to the west across a foot bridge. Go about halfway toward the next foot bridge and then turn to the right and go about 40 yards to find the marker. However, you still have to walk through underbrush that can grab at your clothing.
(Photo courtesy of the
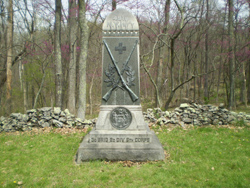
USAMHI and Don Wiles)There is one monument to a sergeant whose story is fairly well known, and that is the sad story of Sergeant Amos Humiston of the 154th New York Infantry Regiment, a regiment in General Oliver O. Howard's XI Corps. Sergeant Humiston's body was found on July 1 without any identification, but he was holding a photograph of his three children. Newspapers all across the North carried the story along with a copy of the photograph, and eventually his widow and family were found. Interestingly enough, Sergeant Humiston is buried in the Soldiers' National Cemetery and his wife became the first matron of the National Soldiers' Orphans Home in Gettysburg, which still stands today at 785 Baltimore Street.
The monument, which was dedicated in 1993, is located in the northeast part of town (only a block or two from the square) on North Stratton Street and approximately one block north of York Street:
Sergeant Humiston is also reportedly depicted on the Coster Avenue Mural as well (see “The Coster Avenue Mural” section further above on this page):
(Image courtesy of Craig Caba and the J. Howard Wert Gettysburg Collection)
(Frank, Fred, and Alice Humiston)
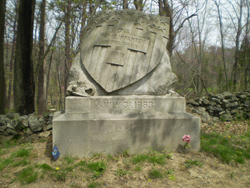
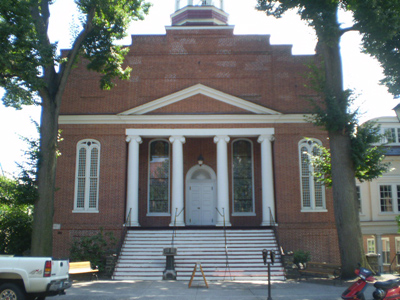
(Image courtesy of Craig Caba and the J. Howard Wert Gettysburg Collection)Located at the steps of Christ Lutheran Church at 44 Chambersburg Street is another small and unusual monument. The monument is to Chaplain Horatio S. Howell of the 90th Pennsylvania Infantry Regiment. As Chaplain Howell was coming out the front door of the church on the afternoon of July 1, he was confronted by Confederate soldiers during the Union retreat who saw his officer’s sword and ordered him to surrender. Howell reportedly announced that he was a chaplain and refused to surrender his sword, and was shot and killed on the church steps:
(Photo courtesy of the USAMHI and Don Wiles)On another part of the battlefield, Culp's Hill, there is a small marker to a Union major, Major Joshua Palmer, of the 66th Ohio Infantry Regiment. To reach the marker, take the far left hiking path in front of the statue of Brigadier General George S. Greene down to the large monument to the 66th Ohio Infantry Regiment. The marker to Major Palmer is just a few yards further down the path:
(Photo courtesy of the Civil War Library Museum and Don Wiles)Another overlooked marker is a plaque attached to a boulder located on the north side of Sickles Avenue across the road from the bigger and better known monument (with the likeness of an Irish wolfhound on the front of it) to the Irish Brigade. The plaque marks the location of a temporary field hospital of the 32nd Massachusetts Infantry Regiment that was directly in harms' way during the seesaw battle for the Wheatfield on July 2, and honors their Surgeon, Z. Boylston Adams. The regimental monument, in the shape of a pup tent, is located further up the road on the left.
(Photo courtesy of the
USAMHI and Don Wiles)One of my favorite "out of the way" markers is what I refer to as the Armistead-Hancock Masonic marker near the tablet honoring all of the Union XI Corps field hospitals, one of which was located on the George Spangler farm east of the Baltimore Pike and was the hospital where mortally wounded Confederate General Lewis Armistead was taken after Pickett's Charge:
Erected in February of 2000, the marker commemorates the friendship of the two generals, both of whom were wounded on July 3. The marker is located just off the road and at the entrance to the lane to the former George Spangler farm. To get to this marker, take the Baltimore Pike south from town until you see a street sign on the left (east) side of the road for "McAllister Mill Road". Turn right and go up a winding road about .1 of a mile to a "T" intersection. Then go left .3 of a mile on Blacksmith Shop Road --- the marker and farm lane will be on the right. Be extremely careful for any and all vehicular traffic since there is no real place to park along Blacksmith Shop Road. To return to the battlefield, retrace your steps and stay left when you get to the "T" intersection and take Granite School House Lane: it will take you to the Taneytown Road and just a short distance south of General George Meade's headquarters at the Leister House.
Although the George Spangler farm is normally only open for tours during the Summer, special tours are sometimes available. During one such tour in October of 2009, I was able to take these three photos of the summer kitchen where General Armistead was taken for medical treatment but later died:
But by far the smallest and most overlooked marker that I know of has to be a shoebox-sized plaque on a flagpole located on the East Cavalry Battlefield, which is roughly 3 miles east of Gettysburg on the Hanover Road. The flagpole is on the on the south side of Gregg Avenue, and the well-worn plaque simply reads, "To the Memory of Brevet Lieut. Colonel William Brooke Rawle 1843-1915". Lieutenant William Brooke-Rawle was an officer in Company H, 3rd Pennsylvania Cavalry Regiment, along with his good friend, Captain William E. Miller. According to both of their personal accounts, although their regiment was ordered to hold its position on the Union flank while the heated cavalry battle on July 3 was occurring, Miller asked Brooke-Rawle if he would back him up if Miller got into any trouble for disobeying orders and led his regiment into the fray. Brooke-Rawle enthusiastically agreed, and their ensuing attack helped in the repulse of General J.E.B. Stuart's cavalry. While Captain Miller was later awarded the Congressional Medal of Honor (see my "Odds and Ends" page), Lieutenant Brooke-Rawle has only a shoebox-sized plaque on a flagpole that I am sure very few of the roughly 1.7 million visitors to Gettysburg every year even know about, let alone see.
(Photo courtesy of the USAMHI and Don Wiles)I am currently researching how many other individual officers and soldiers below the rank of colonel were honored with small monuments or markers, and will add information to this website in the future. In addition, I recommend the book "The Wheatfield at Gettysburg: A Walking Tour" by Jay Jorgensen (see my "Books Worth Reading" page) to learn more about several of the markers mentioned on this page.
Skirmish lines and smaller unitsIn addition to the marker indicating the skirmish line position of the 1st Delaware Infantry Regiment at the Bliss barn on July 2 and 3 (shown elsewhere on this page), I have located a few other markers to skirmish lines. One of these is located along Hancock Avenue on Cemetery Ridge roughly 100 yards south of the Abraham Brian barn and is to the skirmish line position of the 2nd Delaware Infantry Regiment on July 3:
Another marker to a skirmish line is located on the west side of the Emmitsburg Pike roughly 100 yards south of the Nicholas Codori barn. This marker is to the skirmish line position of the 2nd Rhode Island Infantry Regiment on July 4, 1863:
It is the only marker that I am currently aware of that indicates a unit's position the day after the battle, but I am still checking into this. If anyone is aware of any others, please let me know and I will add them to this section.
Another skirmish line marker is located roughly 300 yards further west of the Emmitsburg Road and is somewhat visible from the location of the skirmish line marker that is mentioned above. This marker indicates the position of the right flank of the skirmish line of the 1st Massachusetts Infantry Regiment during the early fighting on July 2, and is easily reached by walking out along the wooden fence that runs just south of the Virginia Memorial on Seminary Ridge (visible in the background of the bottom left photo):
Occasionally, an entire regiment was used to form a skirmish line, as was the case with the 28th Pennsylvania Infantry Regiment on the eastern side of Culp's Hill near Rock Creek for most of July 2. Although the monument is visible along East Confederate Avenue about 75 yards behind the tablet for Confederate General George H. Steuart's Brigade of General Richard S. Ewell's II Corps, many (if not most) visitors assume it is a Confederate monument as well. In any event, the whole 28th Pennsylvania Infantry Regiment (commanded by a captain --- Captain John H. Flynn) of General Henry W. Slocum's XII Corps was positioned near there from about 8 A.M. until 7 P.M. and engaged Confederate forces throughout the day until they were ordered to rejoin their brigade:
(rear of the monument)There is a much smaller marker that can also be found on Culp’s Hill on the right side of Slocum Avenue as you approach the summit, and it is located approximately 65 yards behind and to the right of the monument to the 123rd New York Infantry Regiment (see the “Unusual monuments” section on my “Something Different” page) at the end of a barely discernible footpath:
There are small markers to companies or individual companies like the one just below the summit of Culp's Hill to Company I of the 60th New York Infantry Regiment. Located down the path to the right that is behind the statue to General George S. Greene and roughly 20 yards behind and to the right the monument to the 60th New York Infantry Regiment, the marker is easy to find (slightly visible in the middle of the photo on the left) but the footpath is very steep and rocky in certain spots, so be very careful:
If you are adventurous but also careful, take the steep and narrow footpath behind and to the right of this marker and you can find one of the many large boulders that were incorporated in the defensive lines of the Union troops on Culp's Hill --- another reminder that not all the official monuments are located exactly on the battle lines:
(Photo courtesy of Licensed Battlefield Guide Chris Bagley)If you are even more adventurous, if you proceed carefully further down the hill through the underbrush approximately 60 yards to the east, you can find the large rock formation used as cover by Confederate soldiers that is depicted in the famous sketch and painting by Civil War artist/correspondent Edwin Forbes for Leslie's Weekly magazine:
(Image courtesy of the Library of Congress)
(Image courtesy of the Library of Congress)Does the large boulder at the top of the sketch and painting look familiar ???
There is a small marker to Company G of the 147th Pennsylvania Infantry Regiment that is located on the south side of Culp's Hill along the west side of Geary Avenue across from Pardee Field. The maker is immediately behind and to the left of the monument to the 147th Pennsylvania Infantry Regiment:
Another company marker that is also on Culp's Hill but much more difficult to find is the one to Company F of the 2nd Wisconsin Infantry Regiment, better known for its participation in the fighting on McPherson's Ridge on July 1. To locate this marker, park carefully along Slocum Avenue as you approach Stevens Knoll and the clearing on your right (see the upper left photo below); then walk along the edge of the treeline on your right about 60 yards (see the upper right photo below) and go into the woods along a narrow footpath --- the marker will be in a small clearing (see the lower left photo below) and to the left of a similarly-sized marker to the entire regiment:
Located on the southwest corner of the square in downtown Gettysburg is a small monument to Company K of the 1st Pennsylvania Reserves, which was commanded by Colonel William C. Talley in General Samuel W. Crawford’s Third Division of General George Sykes’ Union V Corps. Composed of Adams County natives, these soldiers in Company K were literally fighting in their own back yard, so to speak, as they helped to defend Little Round Top in the late afternoon of July 2:
There is one company of Union sharpshooters, Company G of the 1st U.S. Sharpshooters Regiment, which has a small marker roughly 200 yards west of its monument along the west side of the Emmitsburg Road:
Located roughly 15 yards north of the Lydia Leister house along the Taneytown Road is a small monument to Companies E and I of the 6th Pennsylvania Cavalry Regiment (also known as “Rush’s Lancers”), which were on detached service at General Meade’s headquarters:
For more information on the 6th Pennsylvania Cavalry Regiment, see the “The South Cavalry Battlefield --- the other cavalry action on July 3” section on this page.
A small monument indicating the position of Companies G and I of the 4th Ohio Infantry Regiment on July 2 is approximately 80 yards west of Ziegler’s Grove along the east side of the Emmitsburg Road:

In addition to individual company markers like those mentioned above, there is a series of small individual company markers for the companies in the 69th Pennsylvania Infantry Regiment commanded by Colonel Dennis O'Kane. The individual markers (running from north to south) for Companies I, A, F, D, H, C, E, B, K and G are located on either side of the regiment's monument which can be found roughly 25 yards west of the famous "copse of trees" on Cemetery Ridge:
The regiment played an important role in not only helping to repel General Ambrose R. Wright’s Brigade on July 2 (see the “Advanced positions” section on this page) but also Pickett’s Charge on July 3, suffering approximately 140 casualties out of a total of roughly 260 men during those two days.
Advanced positionsMany of these small markers, because of their similarity in size and shape to flank markers, are often overlooked for that very reason. There is the marker to the 27th Indiana Infantry Regiment near Culp's Hill (for more information, see the "Pardee Field and Spangler's Meadow" section on this page):
There is another "advanced position" marker not far from that one, and this one is to the 1st Maryland Battalion, which was commanded by Colonel J. R. Herbert of General Edward Johnson's Division in General Richard S. Ewell's II Corps. This marker is located in the southeast corner of the "saddle" of Culp's Hill at the intersection of Slocum Avenue and Geary Avenue. It is extremely worn, and it is difficult to read:
It is also interesting to note that the monument nearby to that regiment was later changed to the 2nd Maryland Battalion to avoid confusing it with the 1st Maryland - Potomac Home Guard Regiment and the 1st Maryland - Eastern Shore Regiment, both of which were on that very hill with General Henry Lockwood's Brigade of the Union XII Corps (Note: When the 1st Maryland Infantry Regiment was mustered out in the summer of 1862 upon the termination of its enlistment, a new unit was formed from many of the discharged members and became the 1st Maryland Infantry Battalion. It continued under that designation until January 1864, when it was re-designated the 2nd Maryland Infantry Battalion):
Another one of these "advanced position" markers is the one to the 27th Connecticut Infantry Regiment and their charge on July 2, and can be found on the north side of Brooke Avenue south of the Wheatfield about 20 yards downhill and to the right behind their regimental monument and atop a small boulder:
Another such marker is located on the right side of the dirt lane to the Moses McClean farm just south of Oak Hill heading north on the Mummasburg Road and just before you cross over the railroad tracks (Robinson Avenue will be on your left). This small marker indicates the advanced position of the 45th New York Infantry Regiment on July 1:
Another marker is located nearby on Oak Ridge across from the observation tower and roughly 90 yards west of the monument to the 88th Pennsylvania Infantry Regiment (which is featured on my "Something Different" page in the "Unusual monuments" section) at the end of a narrow and grassy footpath. This small marker indicates the advanced position where the regiment charged to repel the troops of General Alfred Iverson's Brigade of North Carolinians on July 1:
The marker indicating the advanced position of the 54th New York Infantry Regiment on July 1 near Rock Creek is much harder to find. To do so, start at Barlow's Knoll and walk in a direct line from the statue of Union General Francis Barlow to the monument to the 153rd Pennsylvania Infantry Regiment, then continue down the hill about 100 yards until you reach the treeline. Then turn right and go roughly another 100 yards along the treeline until you see a very small clearing. Turn left into the clearing and go about 40 more yards; the small marker is in a tiny clearing and only 20 yards or so before you reach Rock Creek:
An easier marker to find on Cemetery Ridge is the one that is approximately 100 yards south of the "High Water Mark" and marks the position where the 13th Vermont Infantry Regiment commanded by Colonel Francis V. Randall advanced on July 3 during Pickett's Charge to fire into the flank of General James L. Kemper's Brigade:
An additional related marker to this movement by the 13th Vermont Infantry Regiment on July 3 is located roughly 200 yards further south and only 20 yards to the west off of Hancock Avenue:
There are two larger advanced position markers on Cemetery Ridge, but which are often overlooked because they are behind and below the rock wall on Hancock Avenue. One of these is located just north of "The Angle" and marks the farthest point reached by the 26th North Carolina Infantry Regiment of General A. P. Hill's III Corps during Pickett's Charge:
The other larger advanced position marker is located just south of the Abraham Brian barn and marks the farthest point reached by the 11th Mississippi Infantry Regiment of General A. P. Hill's III Corps during Pickett's Charge:
Although it is not a stone marker like the ones mentioned above, there is a tablet roughly 30 yards west of the monument to the 59th New York Infantry Regiment on Cemetery Ridge just south of “The Angle” that marks the farthest point reached by General Ambrose R. Wright’s Brigade of the First Division of General A. P. Hill’s III Corps during the Confederate assault on Cemetery Ridge in the late afternoon of July 2:
Another small advanced position marker can be found on East Cemetery Hill about 40 yards east-southeast of the equestrian statue of General Oliver O. Howard, the commander of the Union XI Corps. This small and often overlooked marker denotes the approximate location of the end of the charge by the 7th West Virginia Infantry Regiment in the Union Army’s efforts to repulse the attack on East Cemetery Hill on the evening of July 2:
There is an advanced position marker for the 39th New York Infantry Regiment (which only had 4 Companies) that is located roughly .3 of a mile east of the Emmitsburg Road on the north side of United States Avenue and about halfway between the Abraham Trostle farm and the George Weikert farm. Commanded by Major Hugo Hildebrandt, the regiment (also known as the Garibaldi Guard) made a gallant charge against the 21st Mississippi Infantry Regiment in the late afternoon of July 2 and then recovered the 4 cannons of Battery I of the 5th U.S. Artillery commanded by Lieutenant Malbone V. Watson. This small marker is near the monument to Watson’s Battery (see the photo on the left below), but it is my understanding that the actual location where this action occurred is slightly further west on a small knoll on the south side of United States Avenue just east of the Trostle barn:

There is an advanced position marker for the 157th New York Infantry Regiment commemorating their participation in the fighting for Oak Hill on July 1, and it is unusual in that it does not contain any inscription to that effect. However, the monument (one of two for the regiment: the one being referred to is the state monument; the other monument erected by the survivors of the regiment is located farther west at the southeast corner of the “T” intersection of Howard Avenue and the Mummasburg Road) which is located north of town at the southwest corner of the intersection of Howard Avenue and the Carlisle Road (Route 34) contains two small plaques indicating that the marker for the advanced position of the regiment is 300 yards farther north (on the west side of the road):
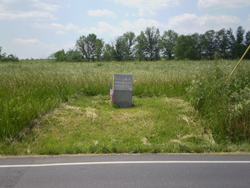
There is a small advanced position marker for the 3rd Maine Infantry Regiment which is located on Berdan Avenue in Pitzer’s Woods on Seminary Ridge:
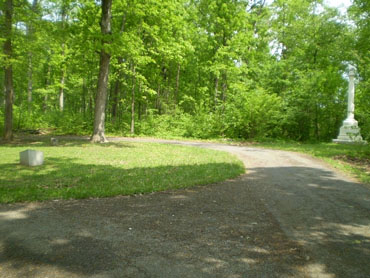
The marker is roughly 1,000 yards northwest of the monument to the 3rd Maine Infantry Regiment that is located on the south side of the Peach Orchard on Birney Avenue:
Located on the east side of Sickles Avenue approximately 100 yards south of the intersection of the Emmitsburg Road and Sickles Avenue roughly 150 yards northwest of the Daniel Klingel farm is the advanced position marker for the 126th New York Infantry Regiment during the fighting on July 2:
In addition, located nearby is the small monument to the 139th Pennsylvania Infantry Regiment located on the east side of Sickles Avenue roughly 50 yards north of the Peach Orchard. On the base of the monument is inscribed “ADVANCED NEAR THIS POINT DRIVING THE ENEMY THE EVENING OF JULY 3”. After Pickett’s Charge, the 139th Pennsylvania Infantry Regiment (now commanded by Lieutenant Colonel William H. Moody), advanced and cleared the area along the Wheatfield Road and recovered a cannon and three caissons of Captain John Bigelow’s 9th Massachusetts Battery which had been lost the day before on July 2.
There is at least one advanced position marker for an artillery unit, and that is the small and unusually plain white tablet for the advanced position that Battery B of the 1st Rhode Island Light Artillery, commanded by Lieutenant T. Fred Brown, held on July 2. Located on a small rise about 100 yards in front of the main Union line on Cemetery Ridge just south of the “copse of trees”, all that is inscribed on the small marker (which was paid for by Lieutenant Brown himself) is “BATTERY B 1st R.I. LT. ARTLY.”, but the brave action by Lieutenant Brown (who was severely wounded) and his cannoneers in defending that portion of Cemetery Ridge late on the afternoon on July 2 against the attack by General Ambrose R. Wright’s Brigade was anything but plain and should not be forgotten:
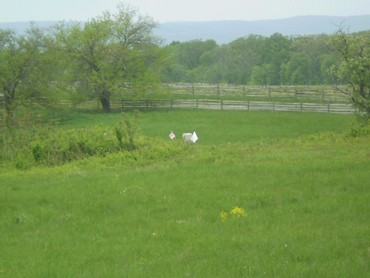
Miscellaneous small markersWhile most battlefield visitors, or at least those who visit the area of the first day's action on McPherson's Ridge, are familiar with the monument on the east side of Meredith Avenue to the 24th Michigan Infantry Regiment of the famous "Iron Brigade," I am sure that far less visitors are aware of the small marker located near Culp's Hill to that same regiment. Located just north of Stevens Knoll at the intersection of Slocum Avenue and Williams Avenue, the few words carved on that small marker still says so much about the terrible fighting and tremendous sacrifice by so many regiments on both sides during those three days in July of 1863. I will let the words speak for themselves --- "OF THE 496 MEN WHO WENT INTO BATTLE ON JULY 1, 1863, 99 ANSWERED ROLL CALL HERE ON THE MORNING OF JULY 2-3, 1863":
Another small marker which I have even overlooked for all these years is the simple block of stone to Company H of the 1st Pennsylvania Cavalry Regiment, which was assigned to the Union VI Corps headquarters of General John Sedgwick. Located on the east side of Sedgwick Avenue along Cemetery Ridge halfway between Wheatfield Road and United States Avenue, the key phrase that caught my eye is "KILLED - 1 MAN," because to me, that soldier (Private Thomas A. Johnson, who was killed on July 2) was just as important as any of the other casualties of the battle:
At the southern corner of the intersection of Mummasburg Road and Doubleday Avenue on Oak Ridge is a small marker which commemorates the heroic “rear guard” action made on July 1 by the 16th Maine Infantry Regiment. Commanded by Colonel Charles W. Tilden, the regiment was ordered to “make a stand” in order to allow the rest of their brigade, General Gabriel R. Paul’s First Brigade, Second Division, of the Union I Corps, to retreat toward town and Cemetery Hill. Eventually being overrun and forced to surrender, the soldiers of the 16th Maine Infantry Regiment tore their flag into pieces and hid the shreds among themselves in order to keep it from falling into Confederate hands:
At the southeast corner of the intersection of the Fairfield Road (Route 116) and West Confederate Avenue on Seminary Ridge is another small marker commemorating the “rear guard” action made by Company D of the 149th Pennsylvania Infantry Regiment, and also names two of those soldiers (Private Joseph H. Baldwin and Sergeant Alex M. Stewart) who paid the ultimate price while their regiment retreated:
Here is a photo of the original marker which was located at the same location as the current one:
(Photo courtesy of Mike Waricher and the GNMP)
The Wentz farm foundation
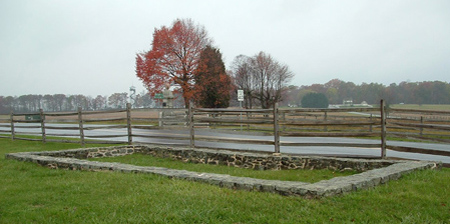
Although easily accessible along Emmitsburg Road, the foundation of the Wentz house is not often visited, but it does have an interesting story to tell about how the Civil War often divided the allegiance of individual family members. John Wentz, the owner of the property, decided to remain in the house during the battle. The story goes that his son, Henry, who had gone south and joined the Confederate Army, was serving as a Sergeant in Taylor's Battery in the Artillery Reserve of General Longstreet's I Corps. Finding himself that day on July 2 fighting in the very area where he grew up, Henry decided to go home and try to see his father, but found him asleep in the basement. Not wanting to wake him, Henry simply left. I recall reading one version of the story that goes even further in that when John Wentz found out later what had happened, he is reported to have said that it was best that his son did not wake him --- he had nothing to say to a traitor. I have not been able to confirm this version, but it would not surprise me if it was indeed true.
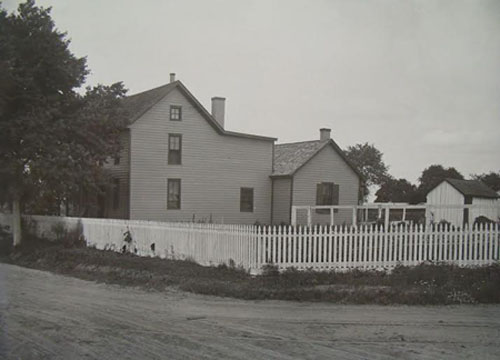
(1909 photo courtesy of Kendra Debany)
The Timbers farm foundation
(view looking north toward Cross Avenue)
(view looking east toward the Triangular Field)
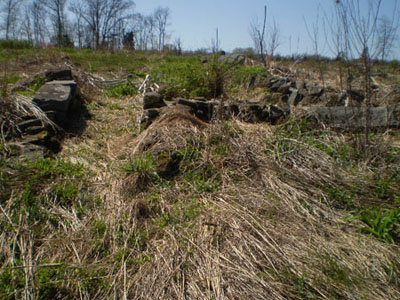
(view looking west toward the Emmitsburg Road on the other side of the ridge)This lesser known and even less-visited foundation has another sad story to tell, but not because of the battle. Located off of Cross Avenue south of the Wheatfield and west of the "Triangular Field," the farm was owned by George W. Weikert at the time of the battle, but after the war, the farm was bought by a free black man named John Timbers. Perhaps being despondent over not being able to make a go of it as a farmer of such rocky land, it is said that John Timbers hung himself. As is in the case of the Sachs Bridge, the foundation is also supposedly haunted.
The famous Devil's Den "dead sharpshooter" locationOne of most famous (and controversial) photographs of the Gettysburg battlefield is the one taken by Civil War photographer Alexander Gardner supposedly of a dead Confederate "sharpshooter" at Devil's Den. This photograph has long been considered as one that was staged by Alexander Gardner and his team of photographers (Timothy O’Sullivan and James Gibson) shortly after the battle. As initially proposed by eminent Gettysburg resident and historian/photo analyst expert William Frassanito in his 1975 book “Gettysburg: A Journey in Time”, the body is likely one that appears in several other Alexander Gardner photographs taken nearby, then moved to the "sharpshooter" location in the famous photo shown below. An infantry rifle (not a sharpshooter’s rifle) was propped up against the stone wall and a knapsack was propped under the soldier's head to complete the composition.
(Photo courtesy of the Library of Congress)
(Photo courtesy of Alan Leeti)The original location is roughly 70 yards (not 40 yards as stated on the wayside marker) west of the staged location:
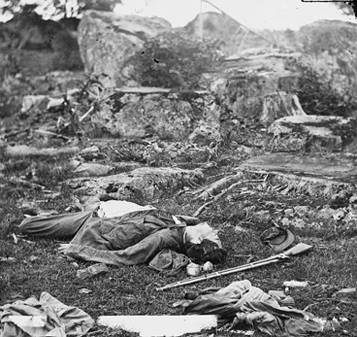
(Photo courtesy of Alan Leeti)
The fortress cave(s)Located nearby roughly 25 yards west of the original location of the famous Devil’s Den “dead sharpshooter” discussed in the section above is what is referred to by historian/photo analyst expert William Frassanito in his evaluation of a photograph by Civil War photographer James Gibson (mentioned in the section above) as “the fortress cave”:
(Photo courtesy of Greg Ainsworth and the Library of Congress)The “cave” was apparently occupied by Confederate soldiers, as you can see vertically stacked wood at the far right side of the “cave”. If you look closely, there is also a dead Confederate soldier further to the right (with his head and rifle facing the camera). The “fortress cave” is roughly 12 feet wide at the opening and is triangularly shaped about 10 feet deep with an opening for “escape” in the back (see the sunlight peeking through in the left corner in the photo below):
(Photos courtesy of Alan Leeti)
(Photo courtesy of Greg Ainsworth)
As you can see, the rear opening is about 20 inches by 20 inches, plenty of room for a Confederate soldier(s) to escape if necessary. But what is also interesting is that while taking the photo above in November of 2020, I discovered another possible “fortress cave” directly adjacent to the other one with approximately the same dimensions and a similar “back door”:
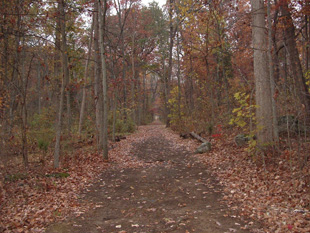
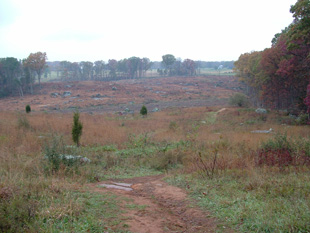
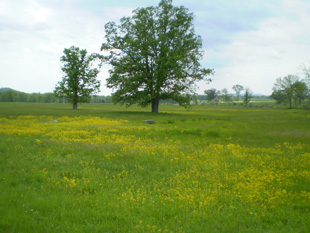
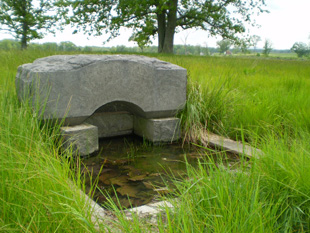
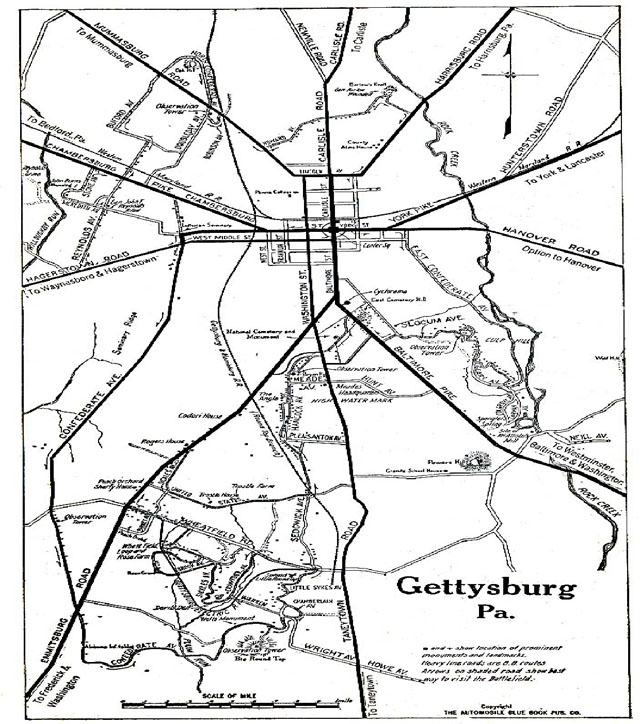
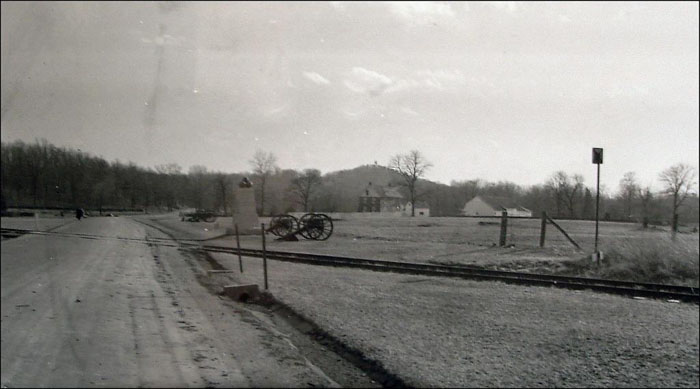

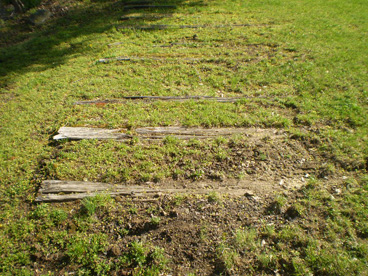
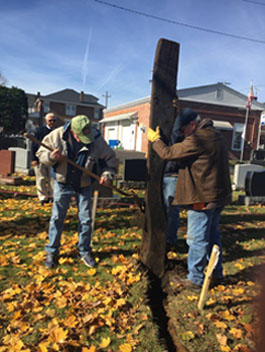
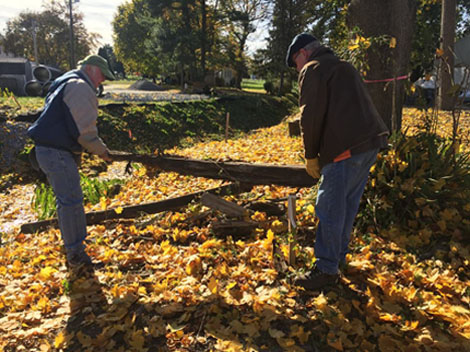
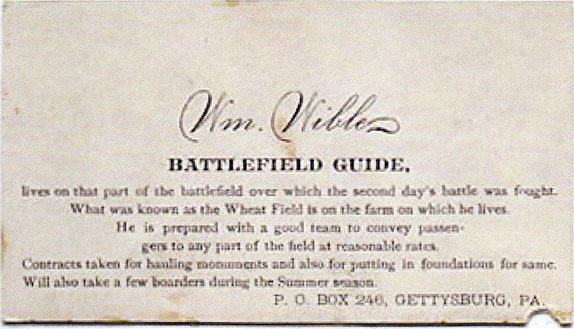
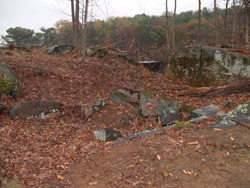
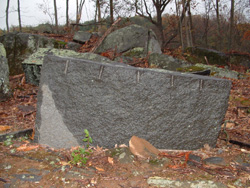
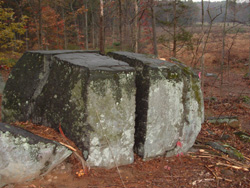
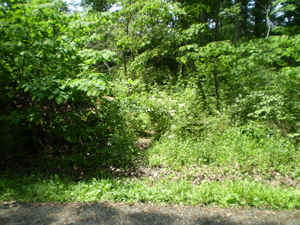
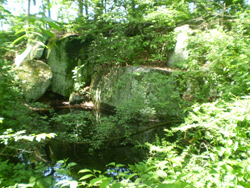
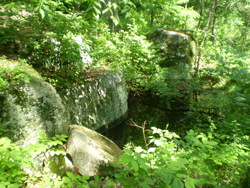
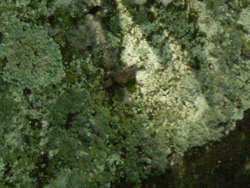
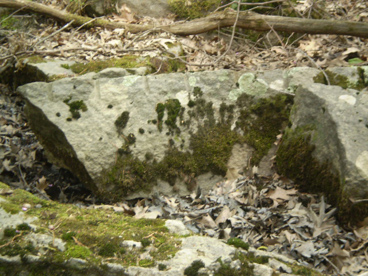
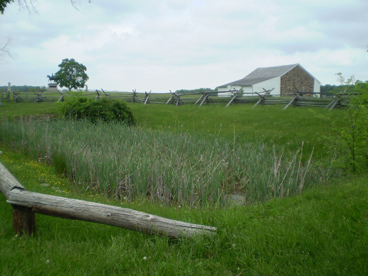
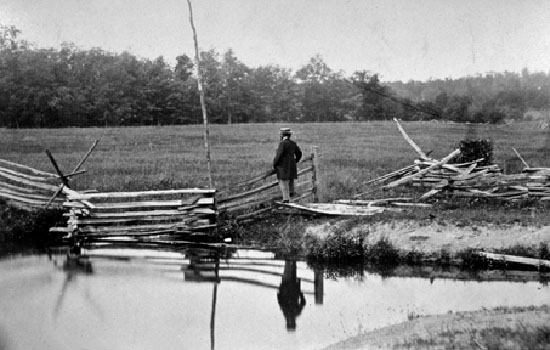
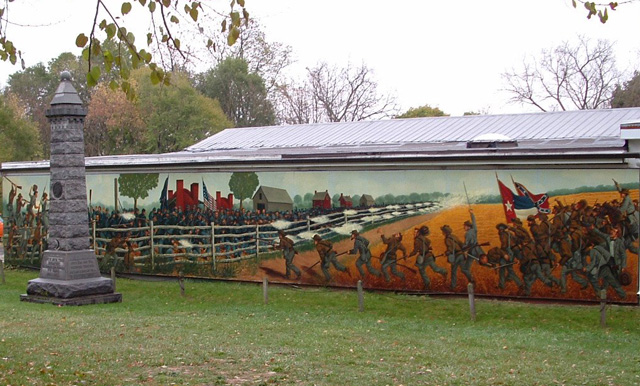
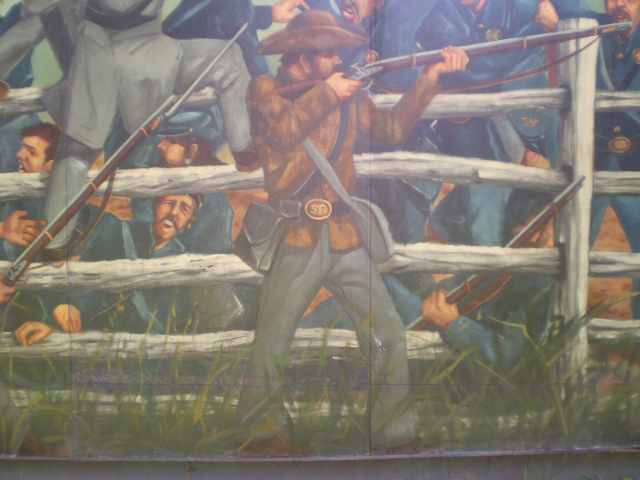
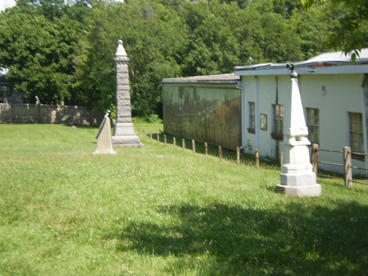
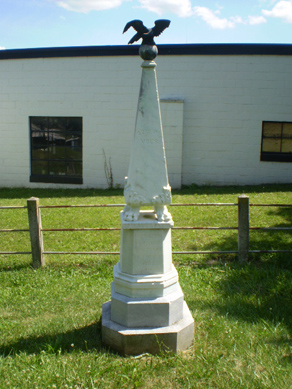
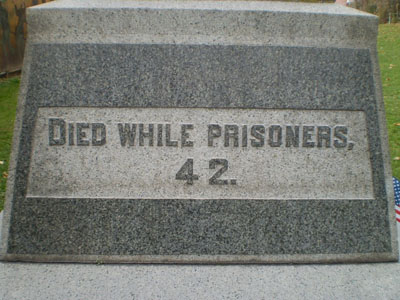
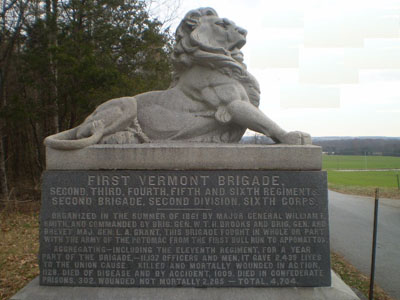

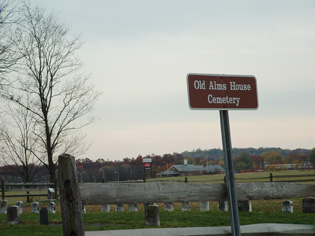
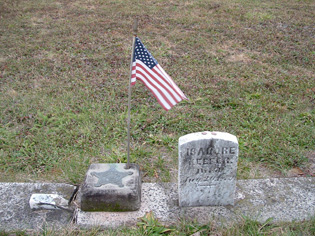
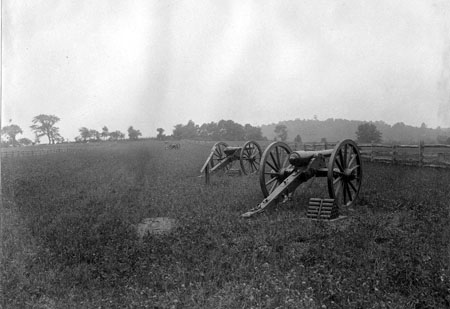
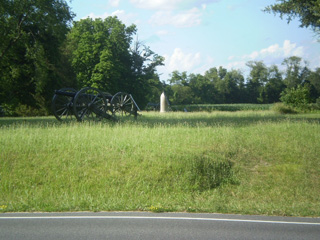
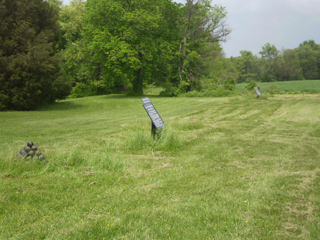
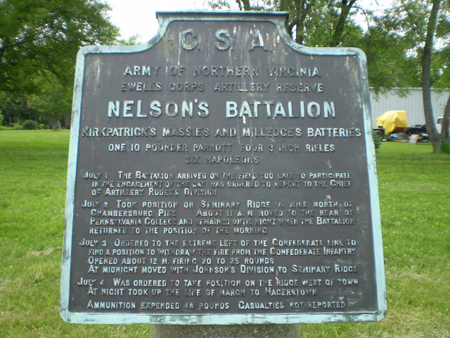
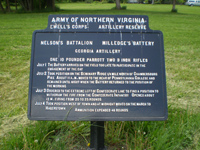
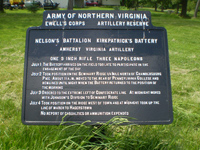
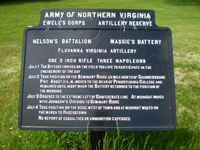
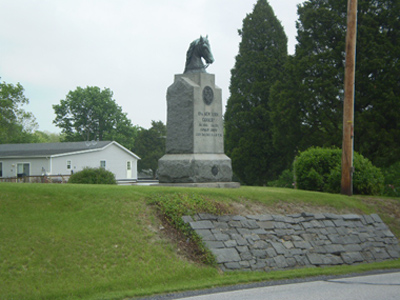
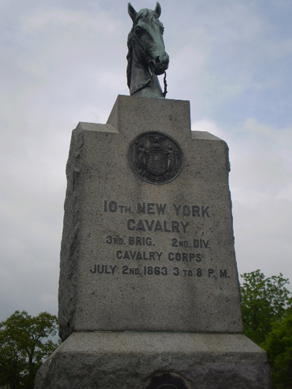
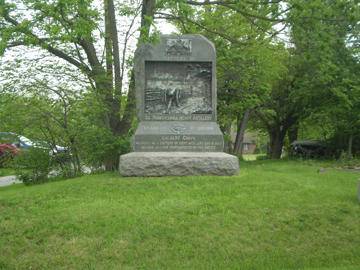
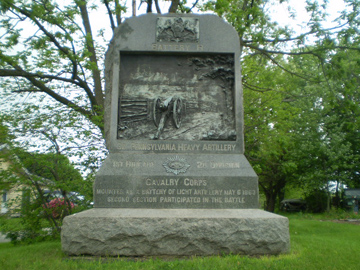
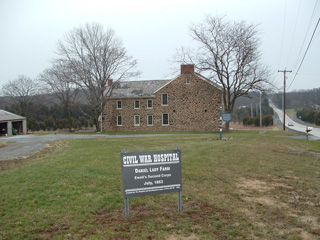
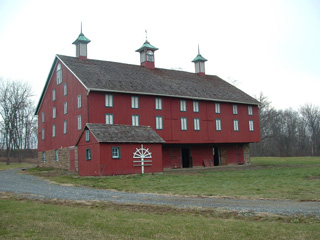
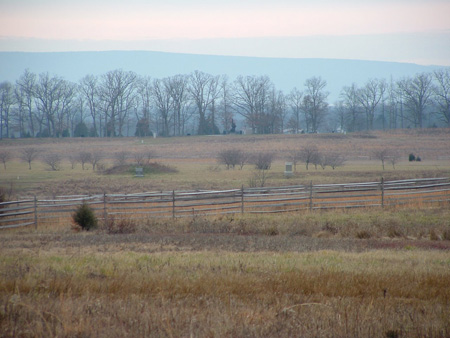
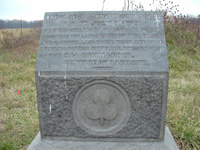
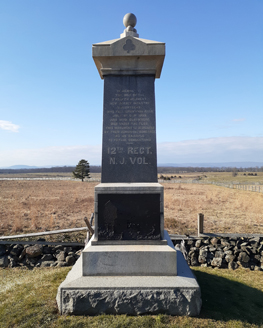
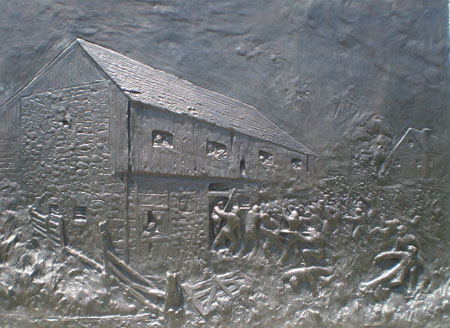
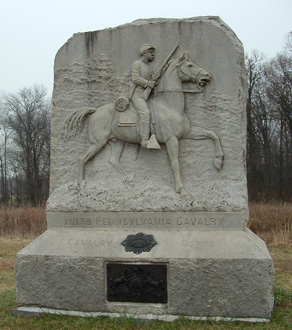
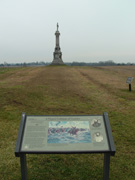
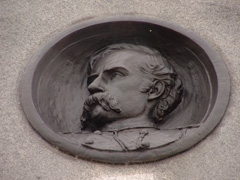
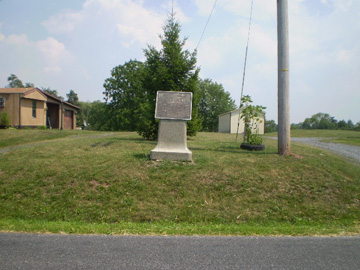
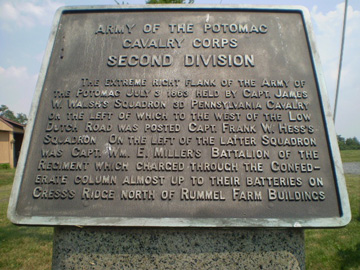
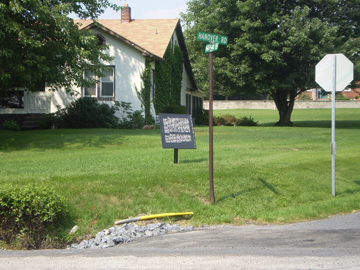
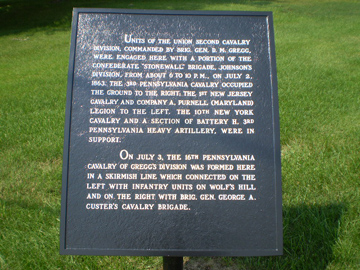
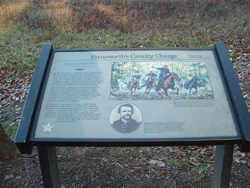
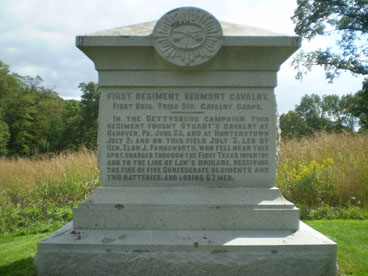
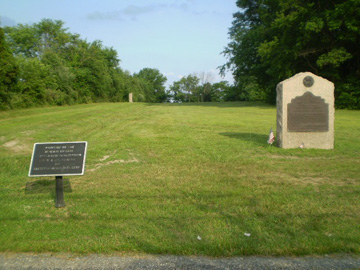

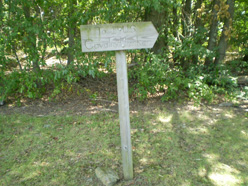
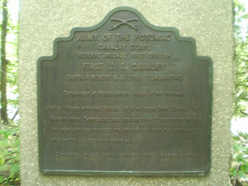
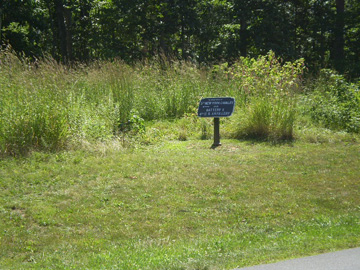

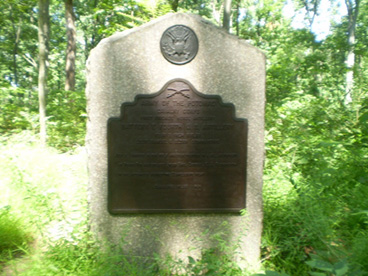
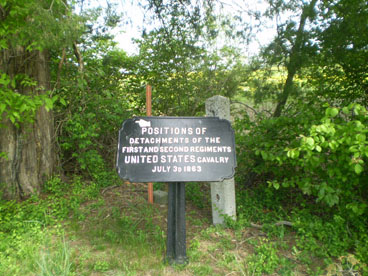
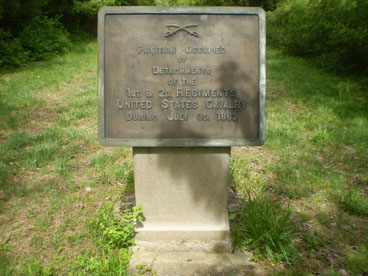

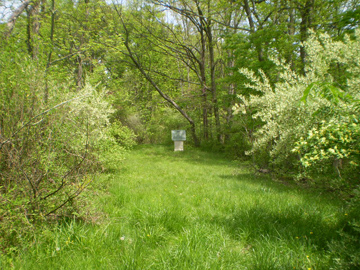
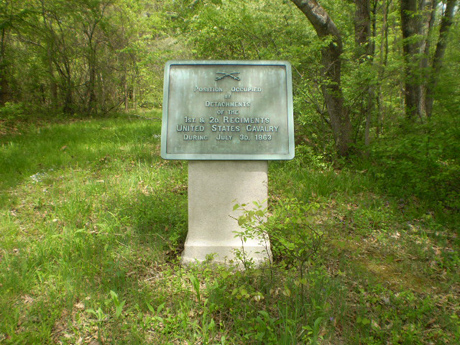
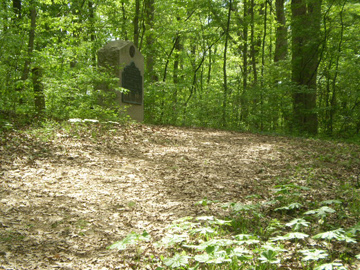
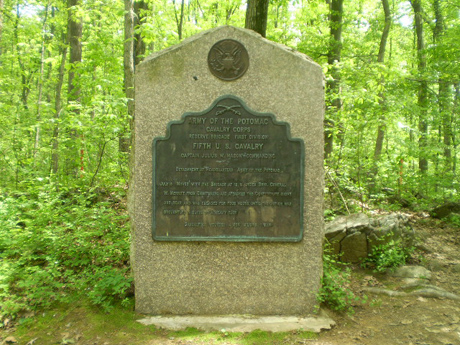
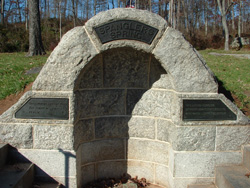
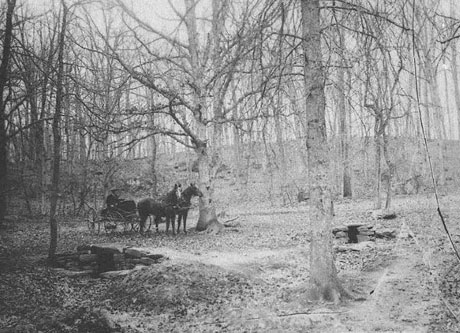
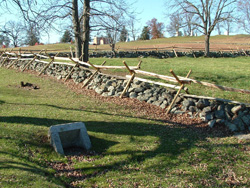
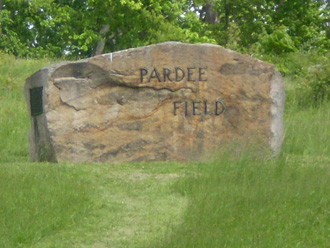
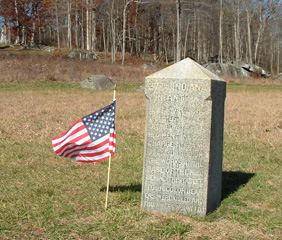

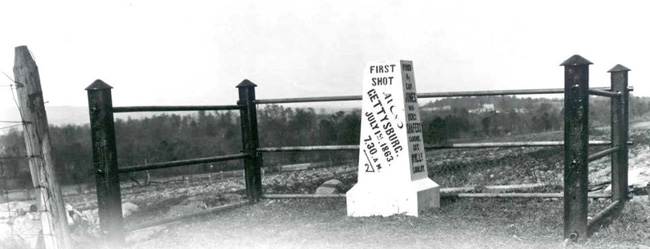

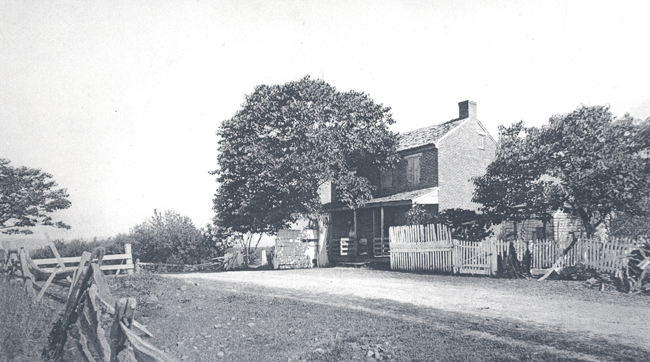
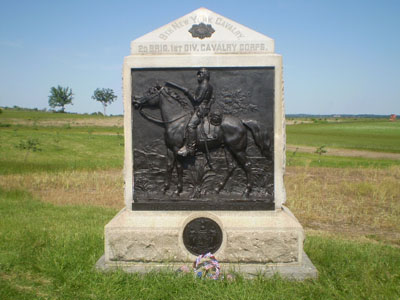
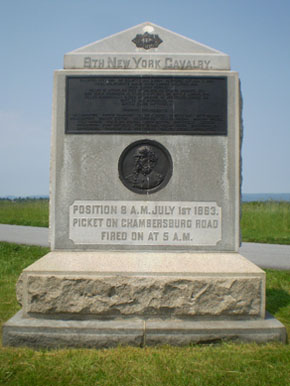
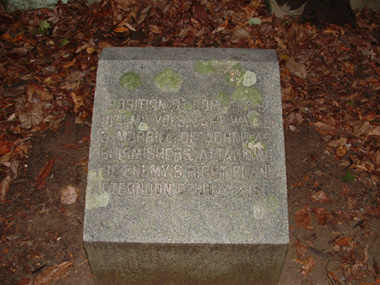
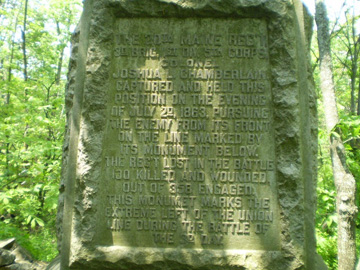
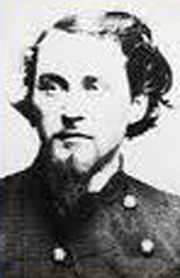
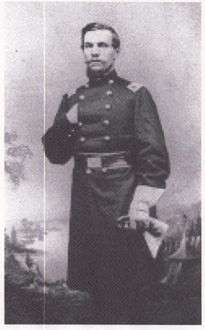
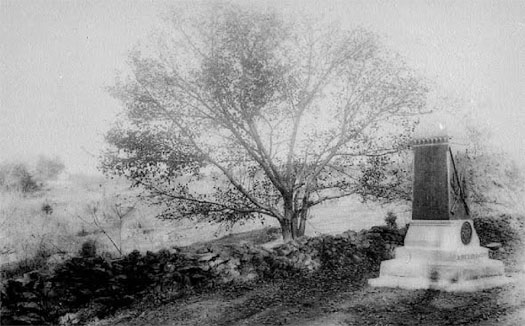
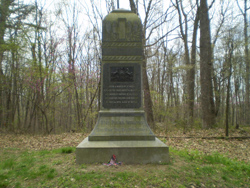
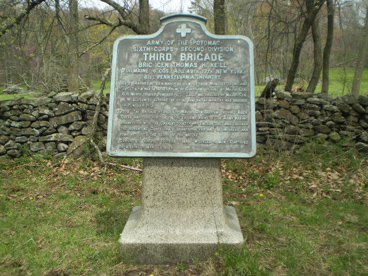
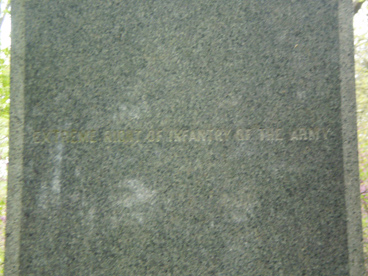
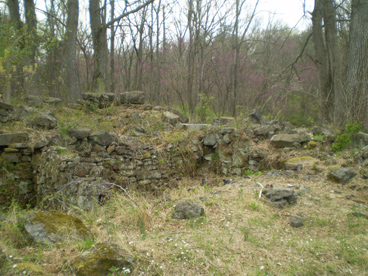
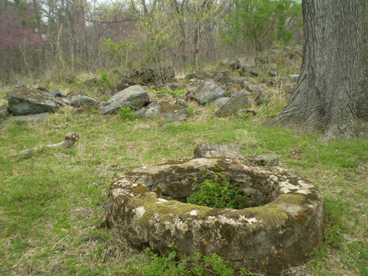
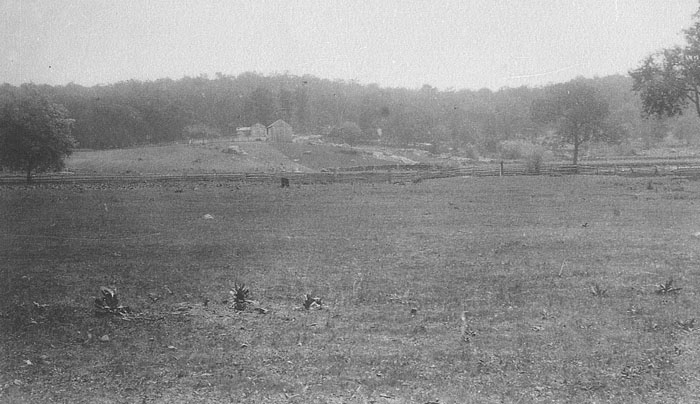
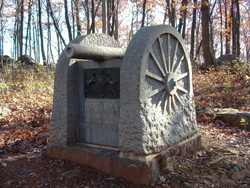
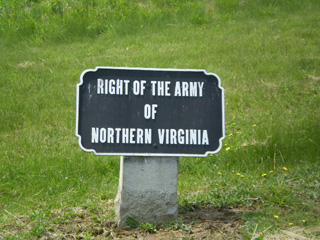
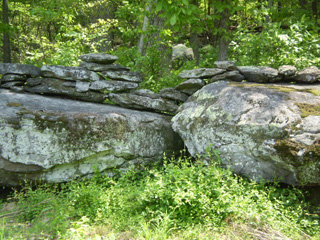
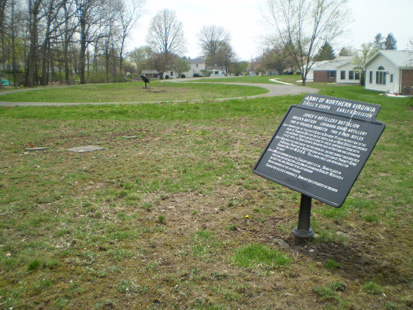
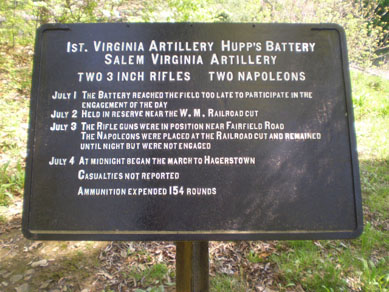

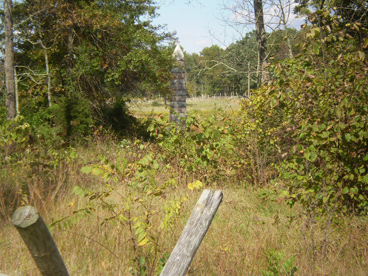
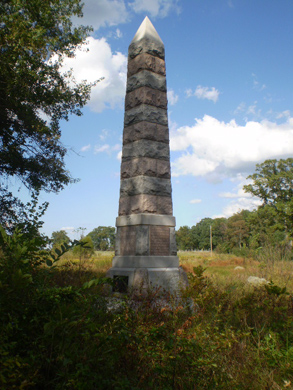
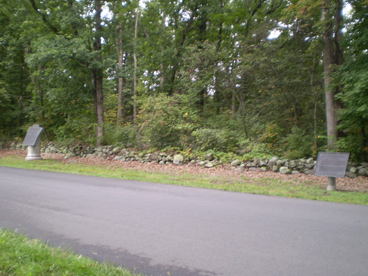
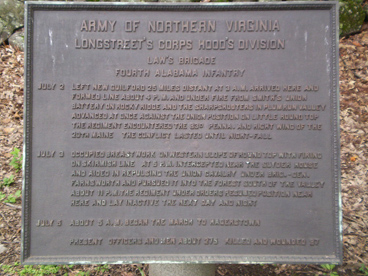
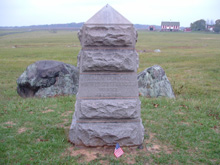
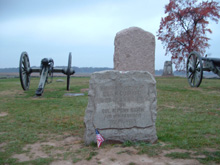
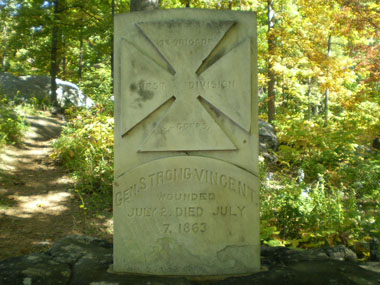
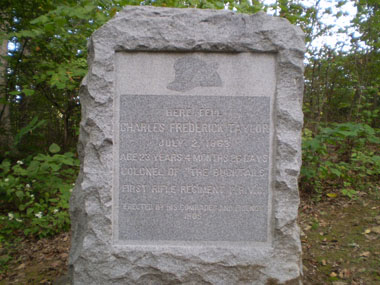
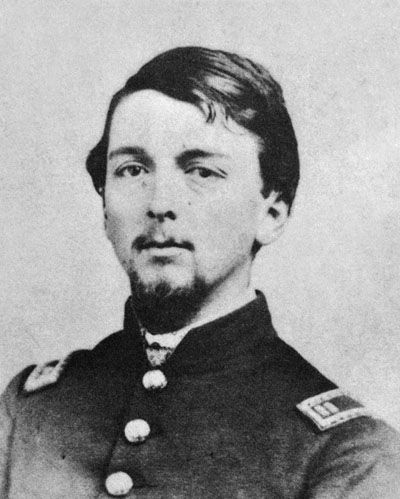
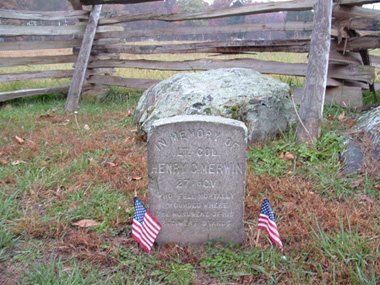
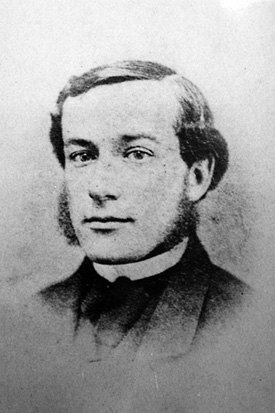

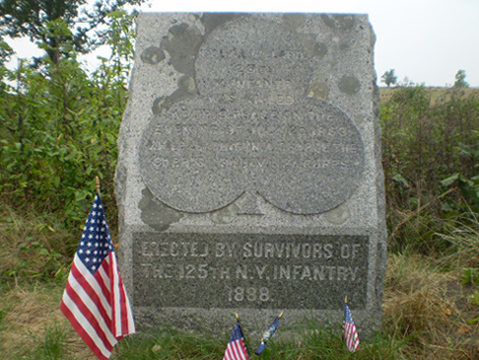
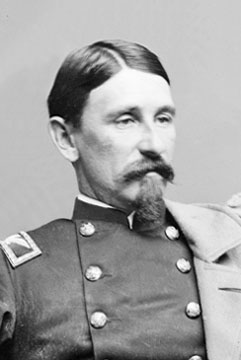
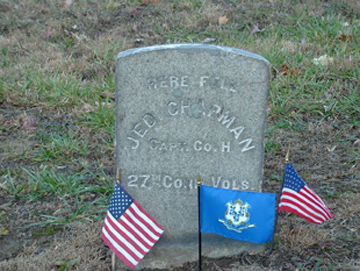
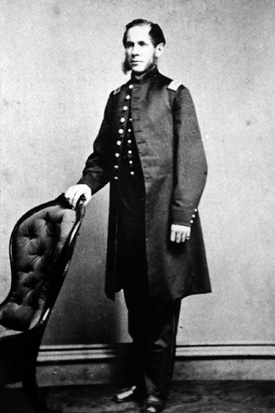
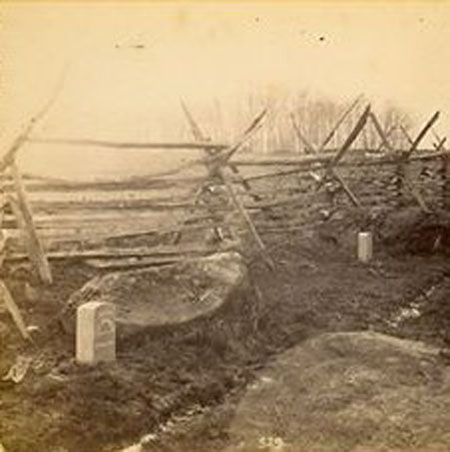
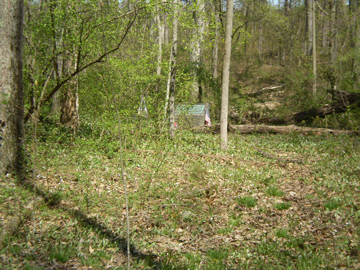

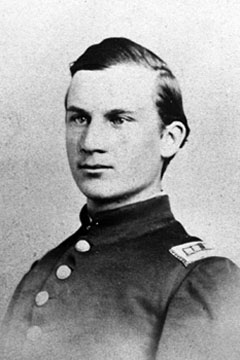
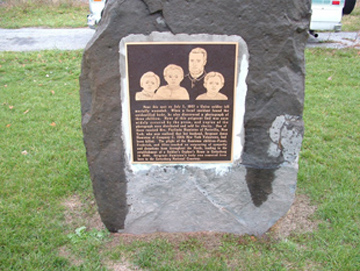
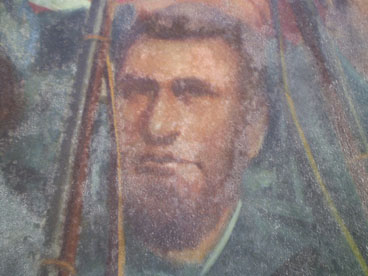

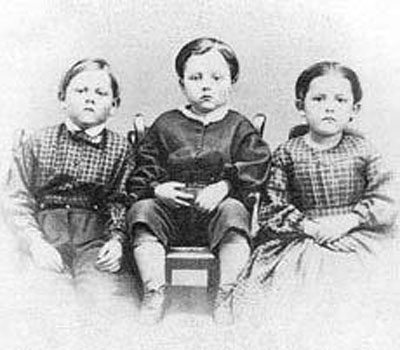
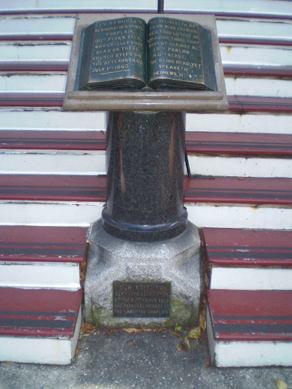
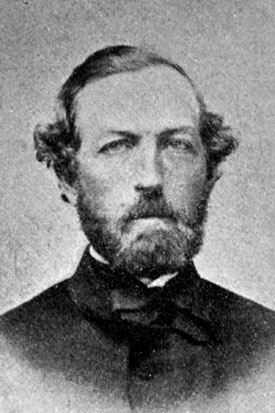
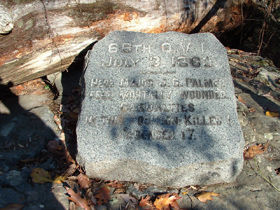
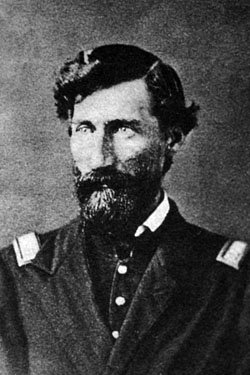
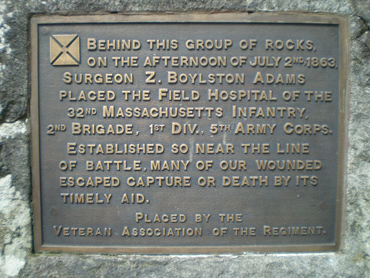
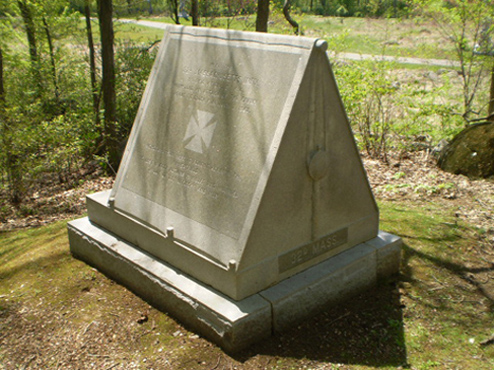
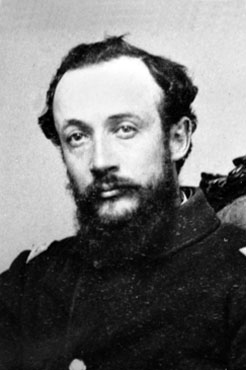
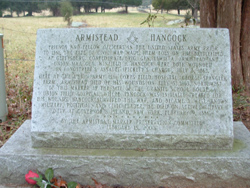
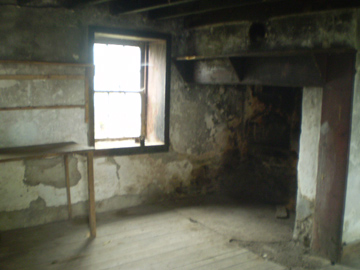
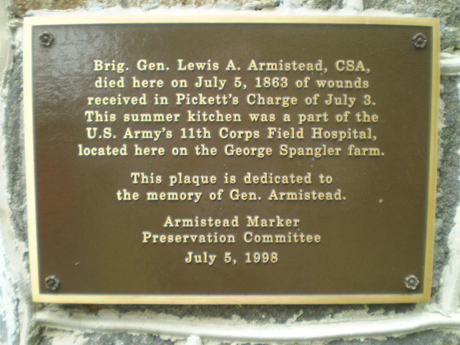
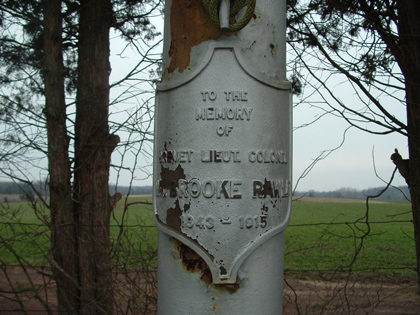
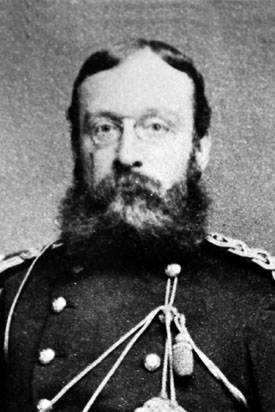
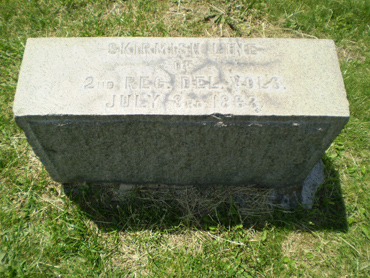
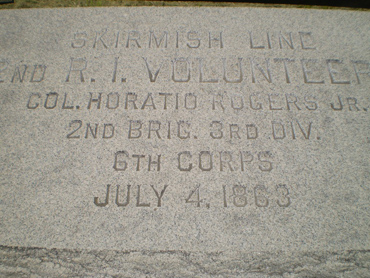
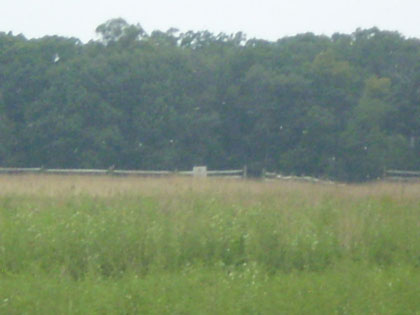
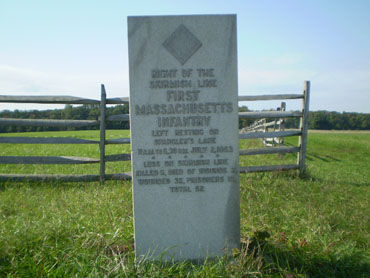
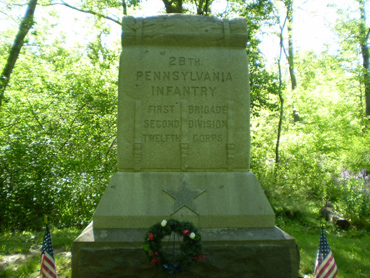
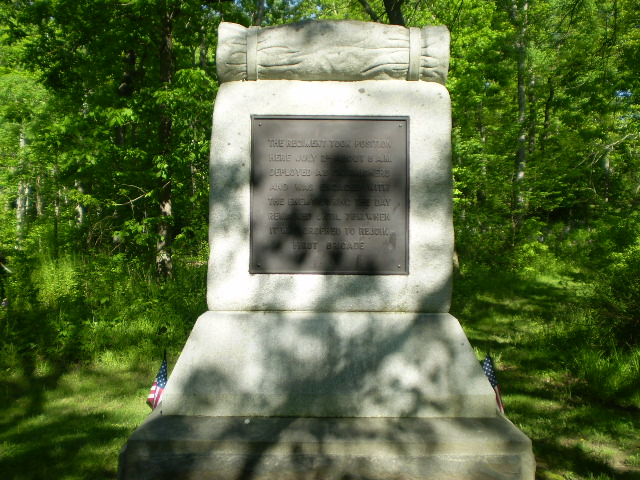
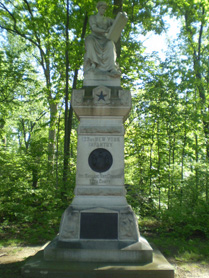
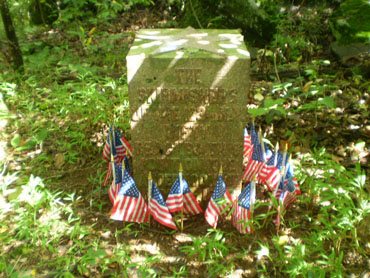
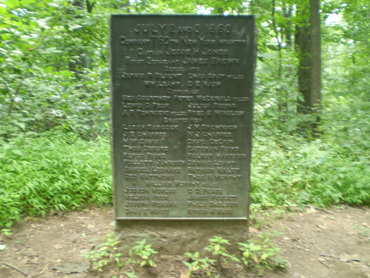
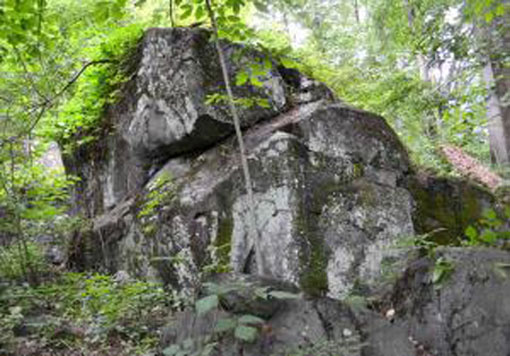
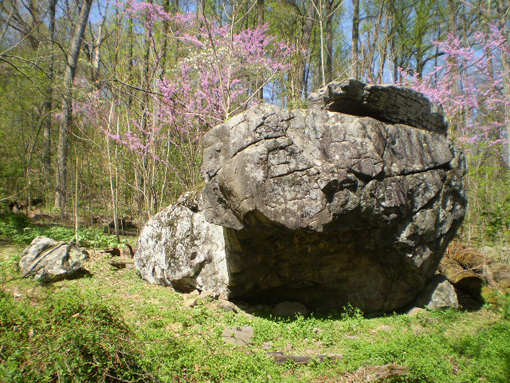
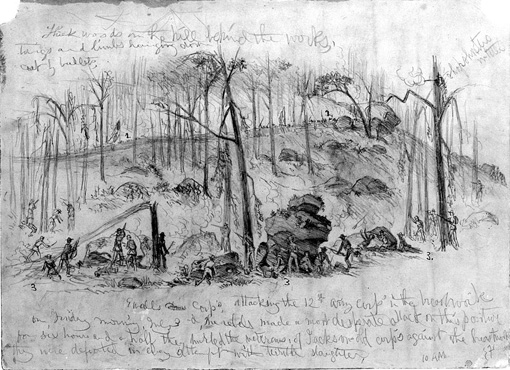
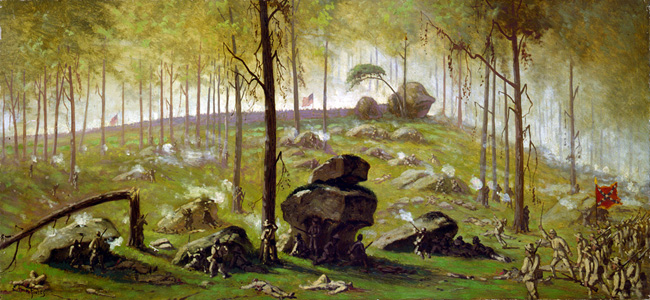
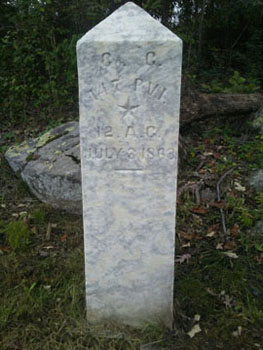

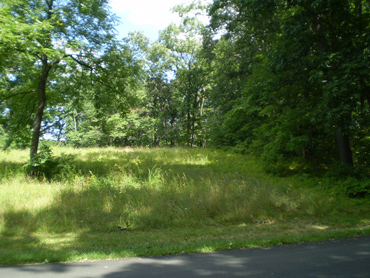
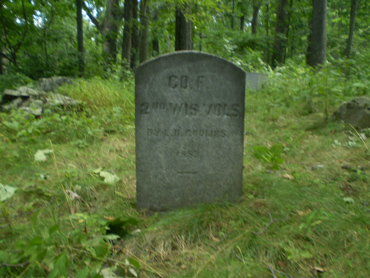
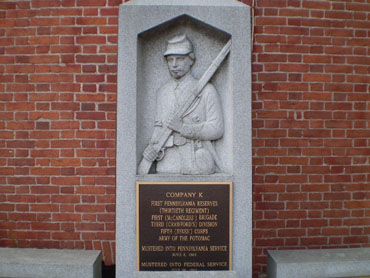
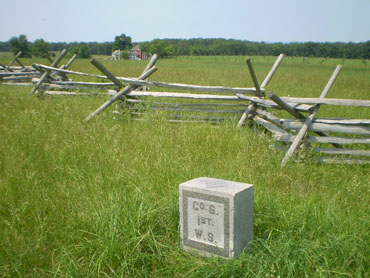
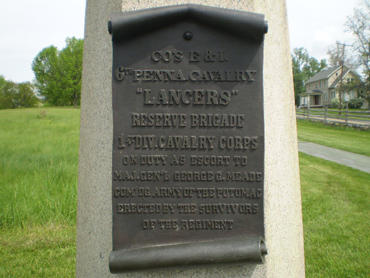
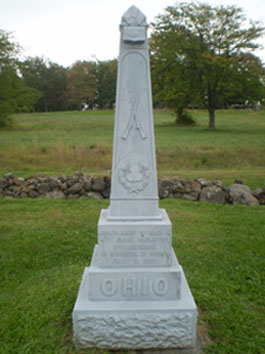
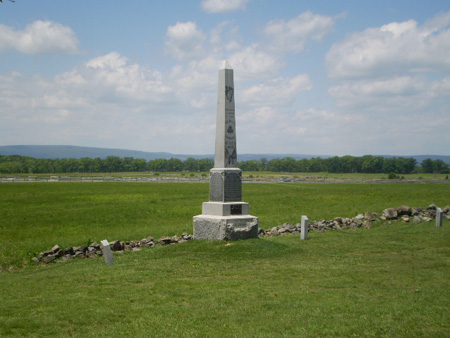
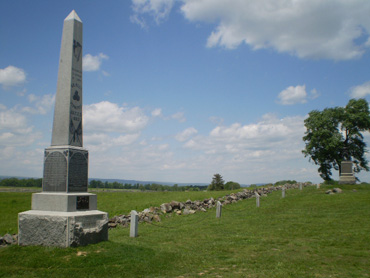
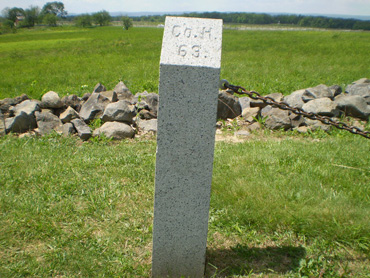
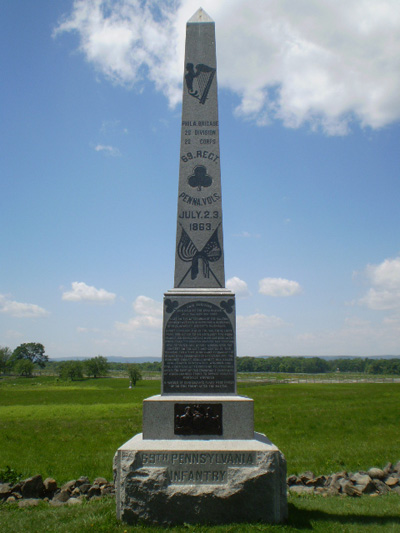
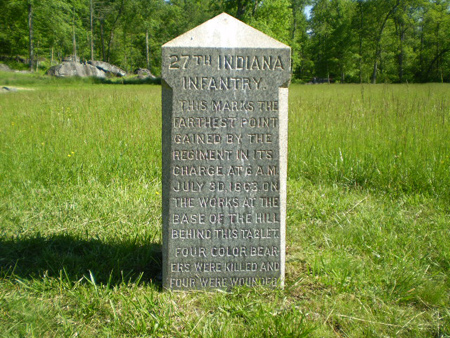
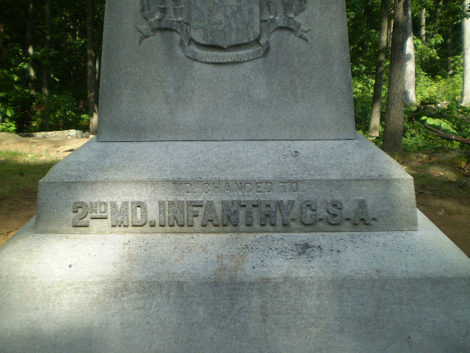
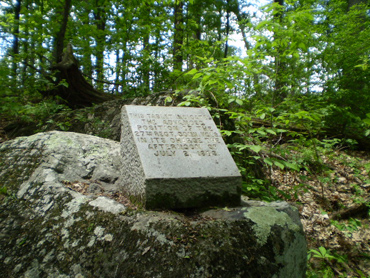
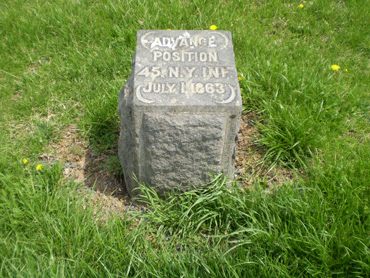
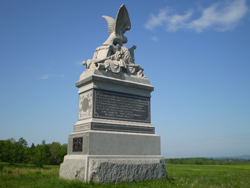
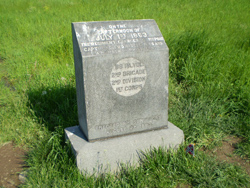

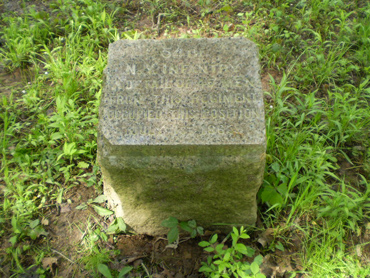
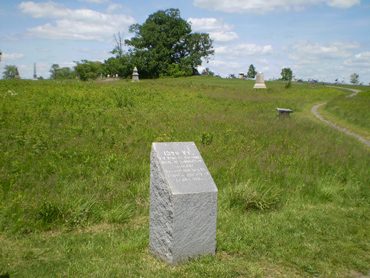
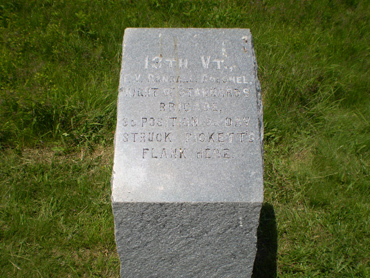
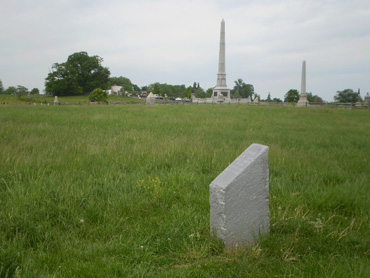
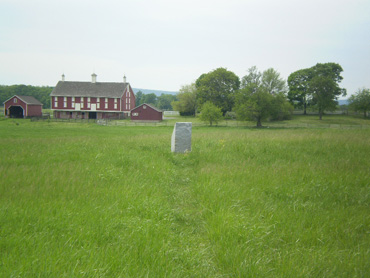
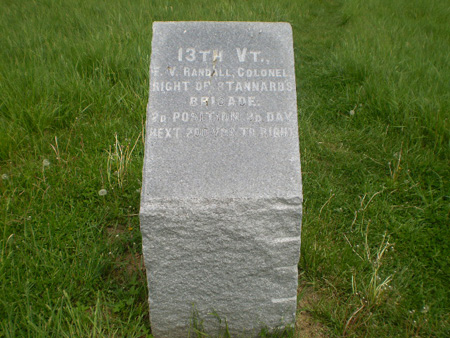
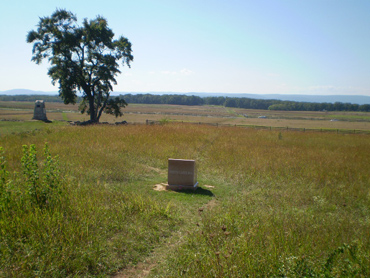
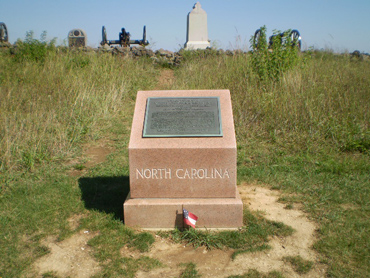
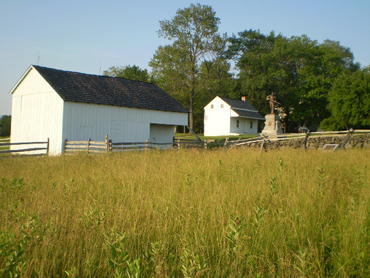
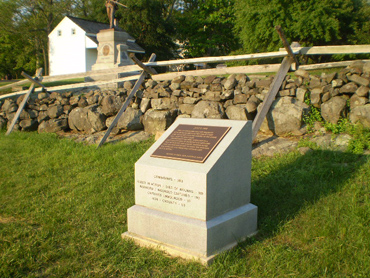
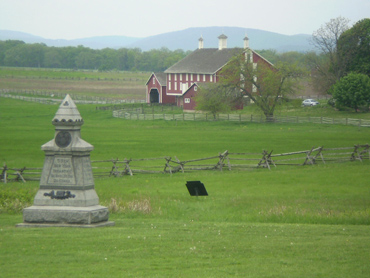
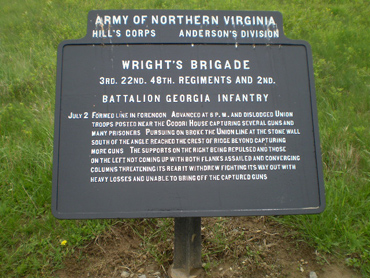
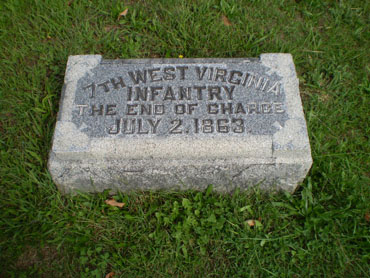
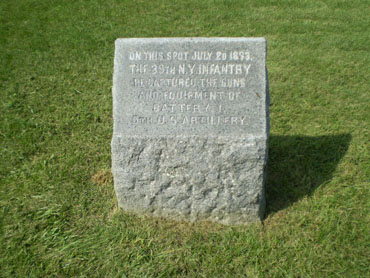
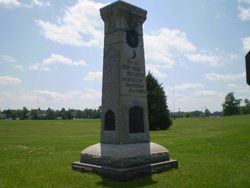
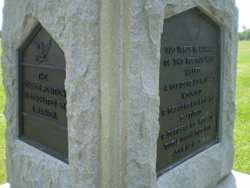
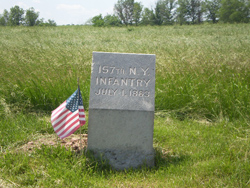
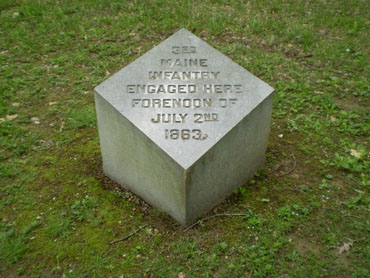
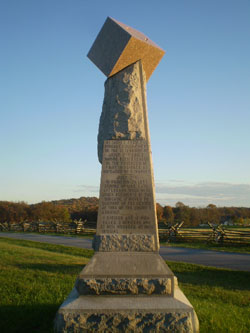
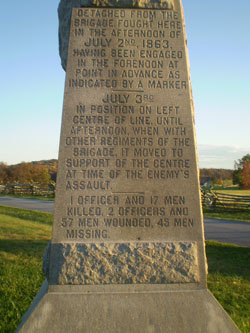
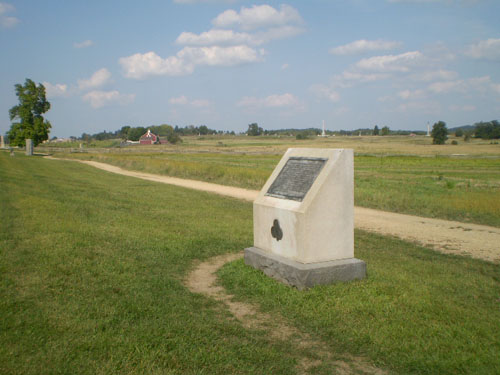
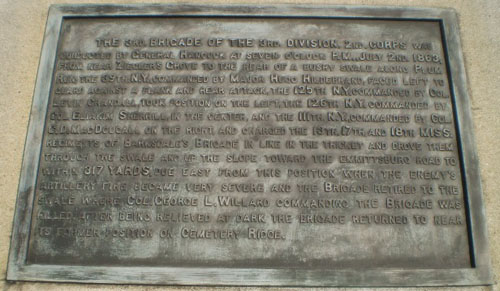
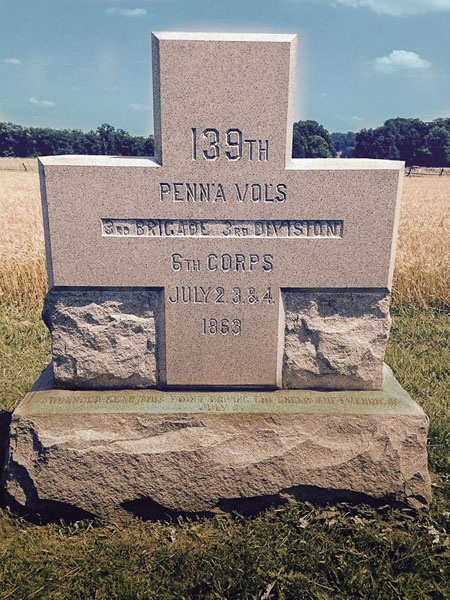

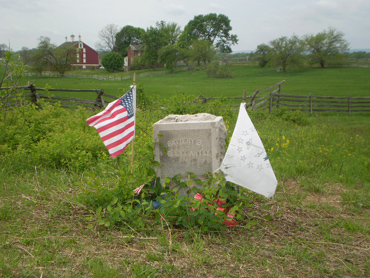
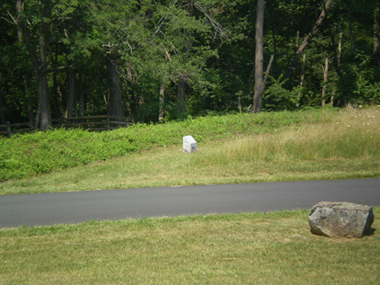
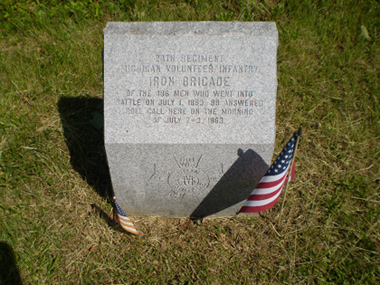

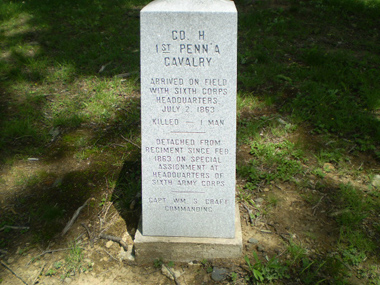
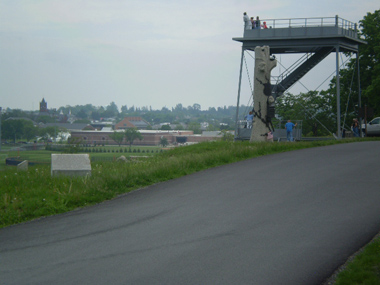
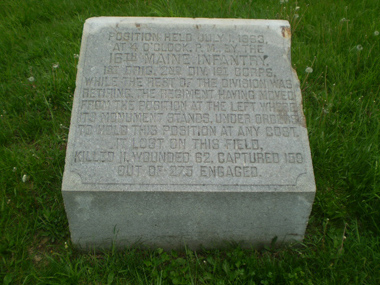
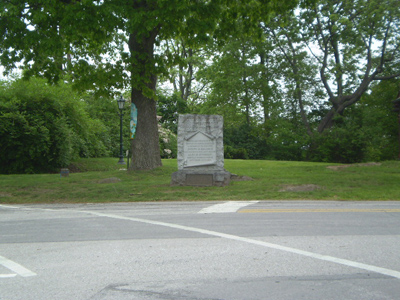
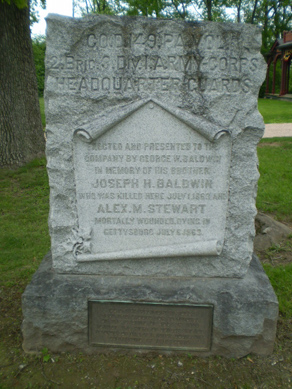

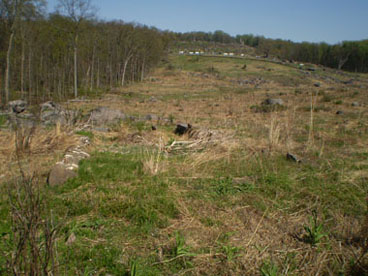
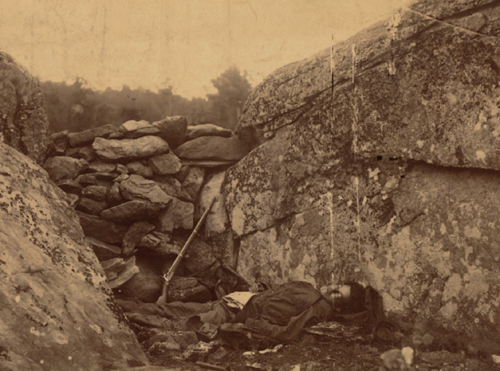
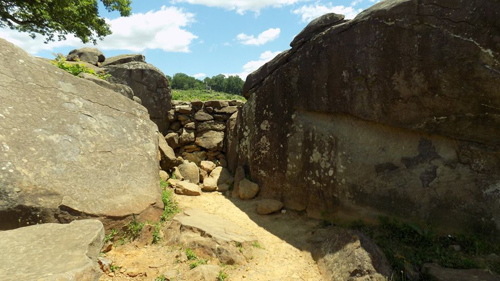
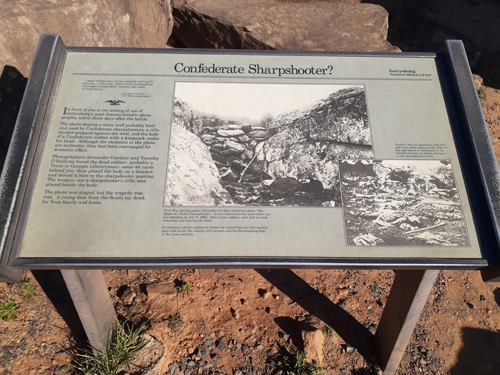
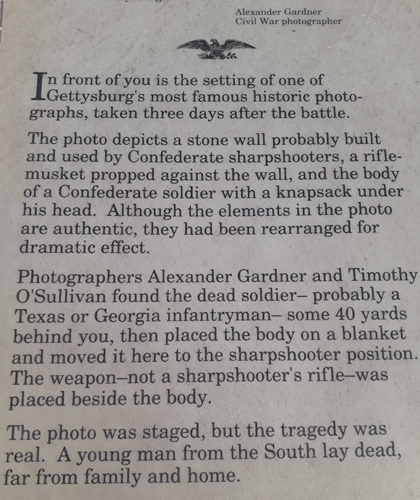
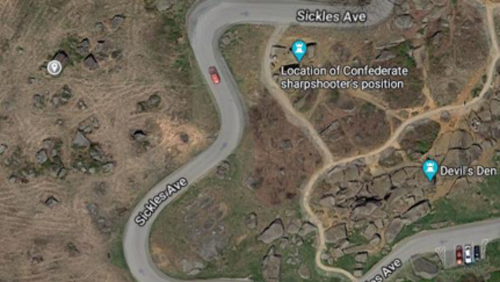
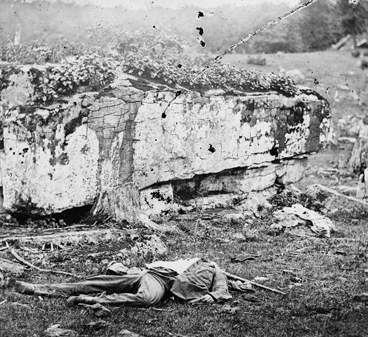
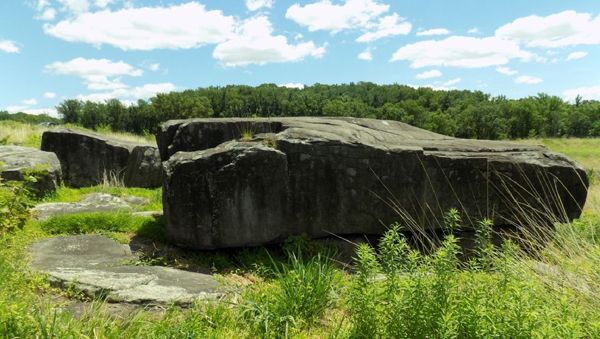
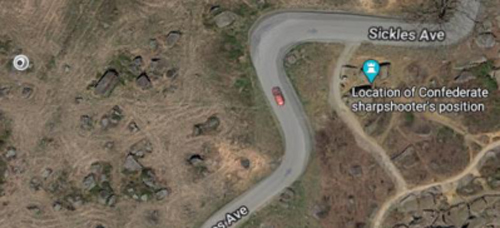
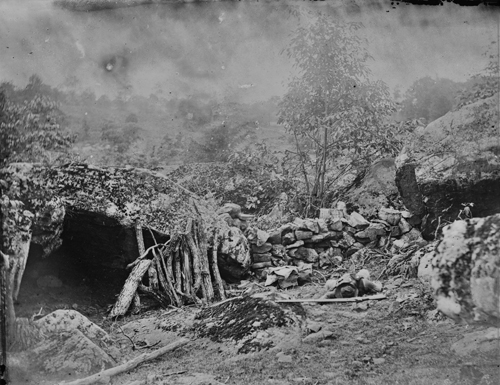
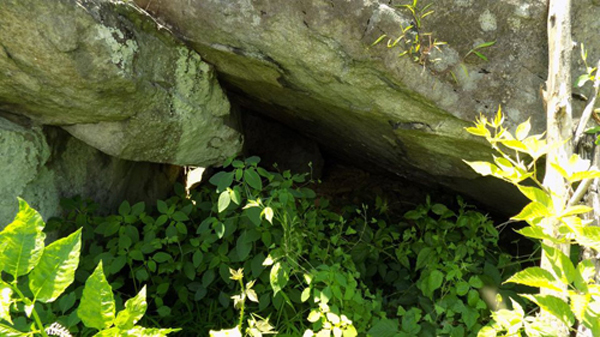
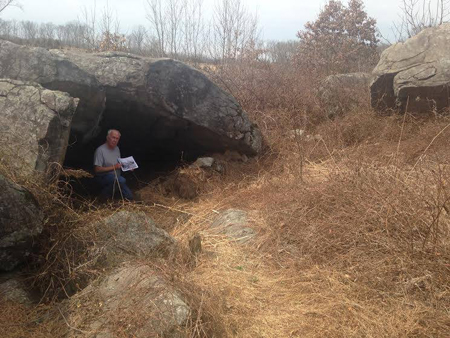
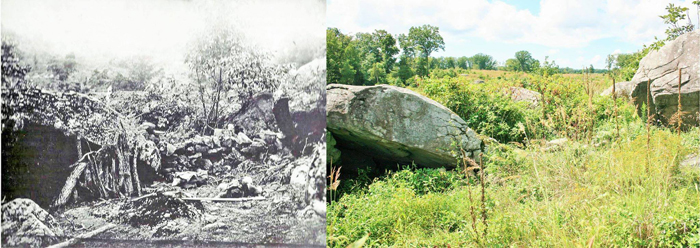

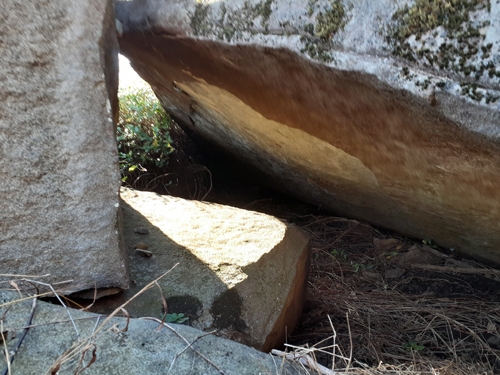
Copyright 2008. Randy Drais. All rights reserved.